


Going “Off the grid” has really changed it’s meaning these days. The assumption that being somewhere vastly remote means no access to a modern way of life can no longer be made. In a world that almost expects us to be connected, having ability to do so regardless where you are is great!
Electricity is a staple commodity when being remote. Building on that, now having data seems just as important in certain situations.
For any adventures I do embark on, I plan to address both of these. To get started though, I’ve addressed my electrical needs for the 4Runner.
Ecoflow Products
Power storage and portability has really come a long way. The days of needing a generator or unergonomic battery setups are really no longer a thing. Modern lithium Ion cells coupled with some great technology – means now carrying only a modest sized unit. You can now have access to ample power to run all your devices with ease.
While there are a few options on the market, I really liked the solutions that Ecoflow provided. They offered good ergonomics, expandability, great solutions for every need, and look pretty sharp too to boot.
The flexibility of having such a system is pretty handy all round for a number of uses as well. It even can act as a high power UPS (uninterrupted power supply) for computing. With all this considered, I felt it would be a pretty good investment.
https://www.ecoflow.com
My Vehicle Setup
For the 4Runner, I wanted to have a setup that gives me enough power, with the ability to add more down the line if I needed. I also wanted to have a charging solution that wasn’t just tied to solar. Setting up panels, and with the rate of recharge being quite slow – these were drawbacks for me. Carrying a backup panel is a great idea, but I felt I needed a better solution as a primary setup. Also if I found myself with a high drain situation the need to get into even larger units enters the conversation which I didn’t want due to cost and space. I want things to stay neat and minimal, but still be very capable.
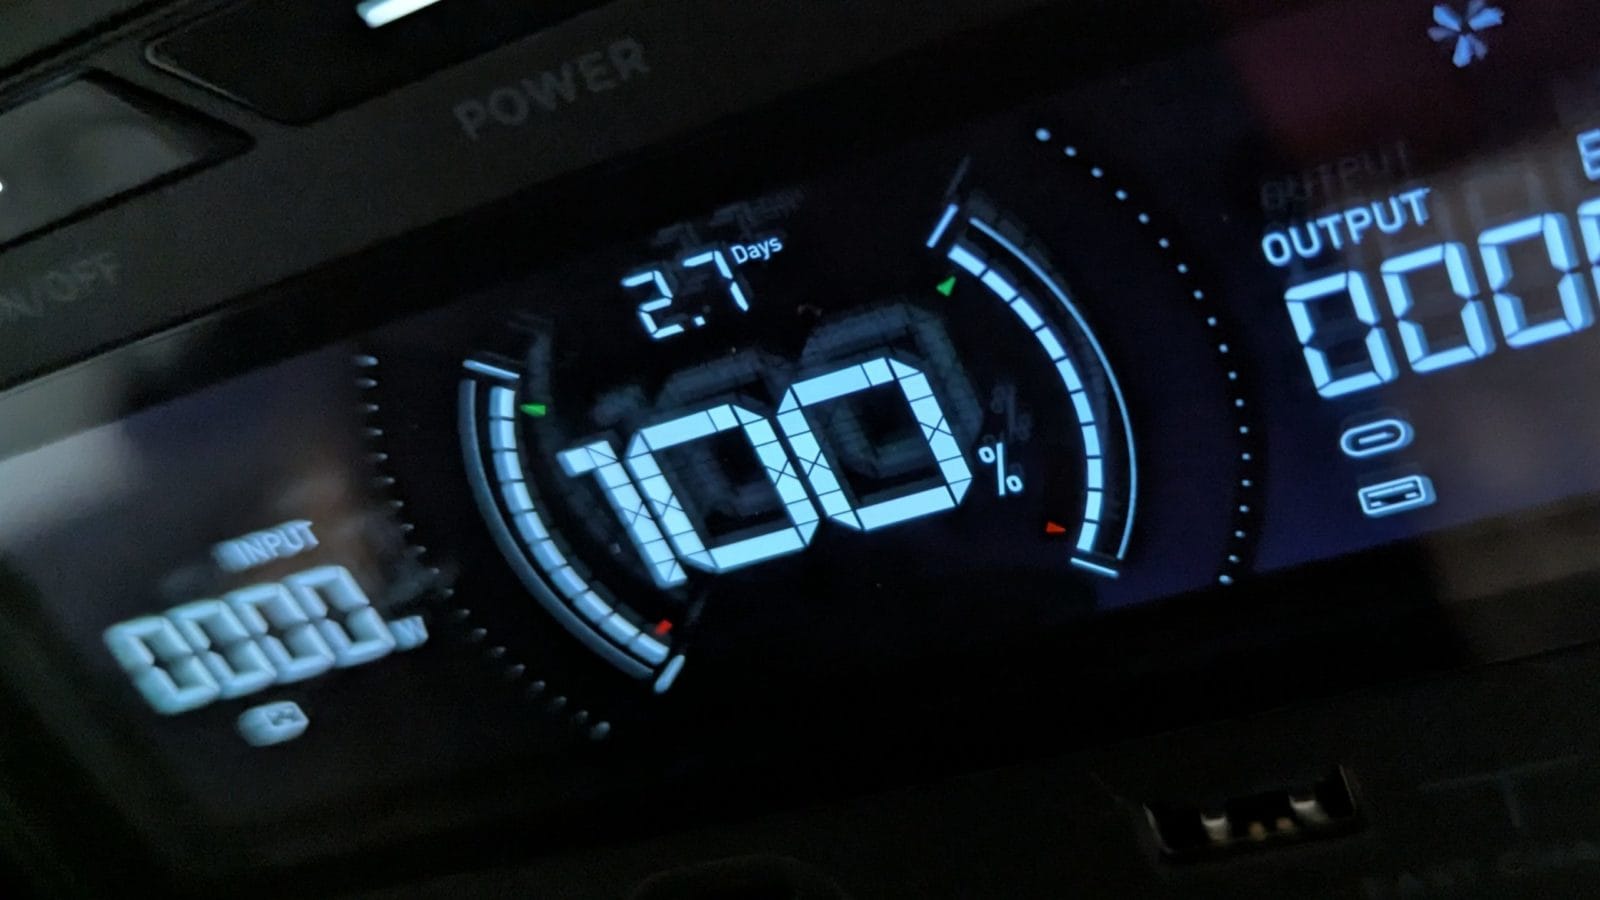
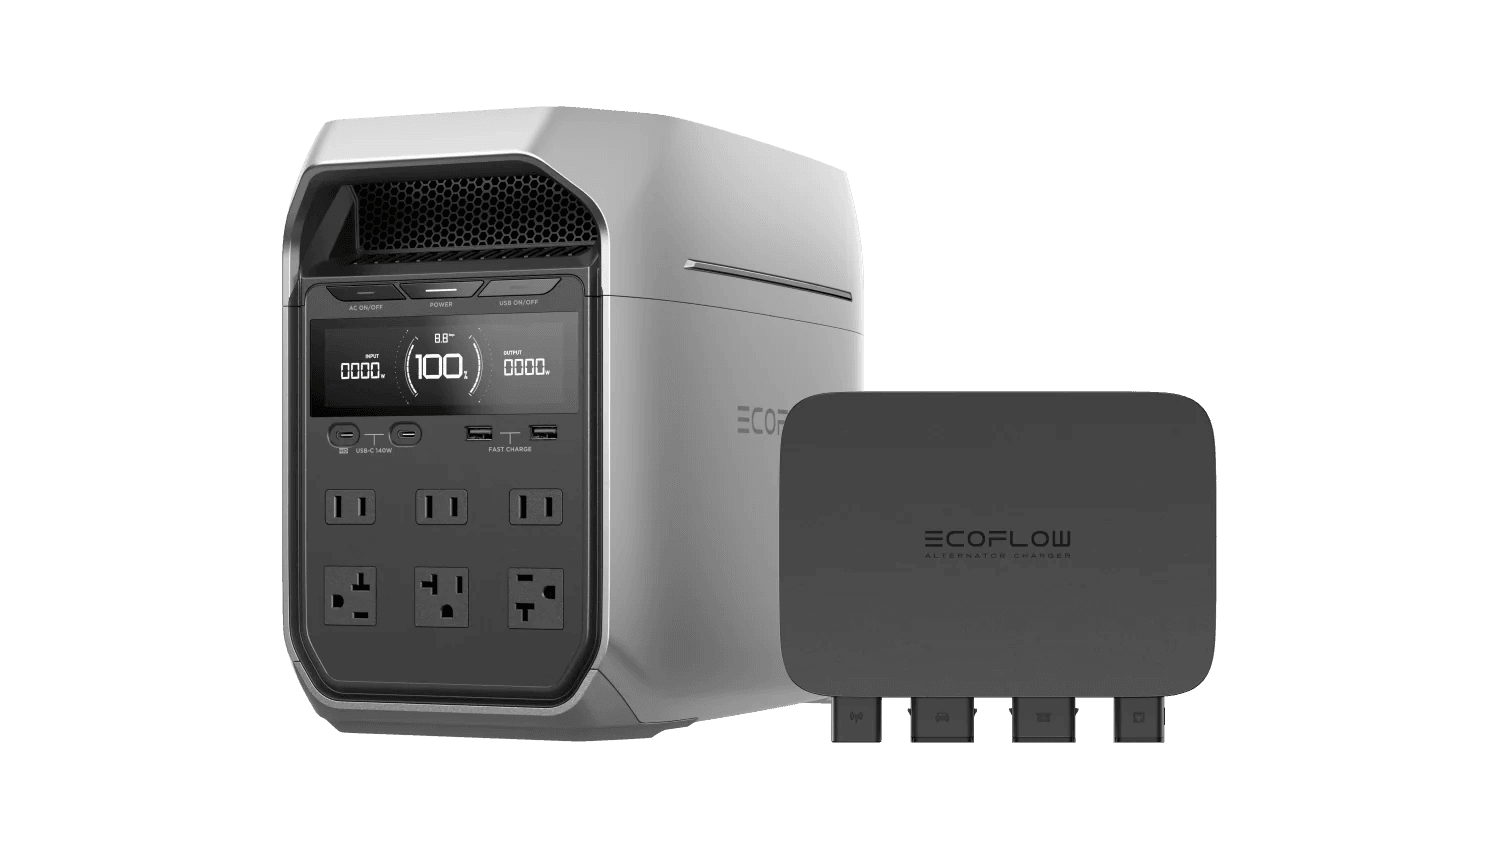
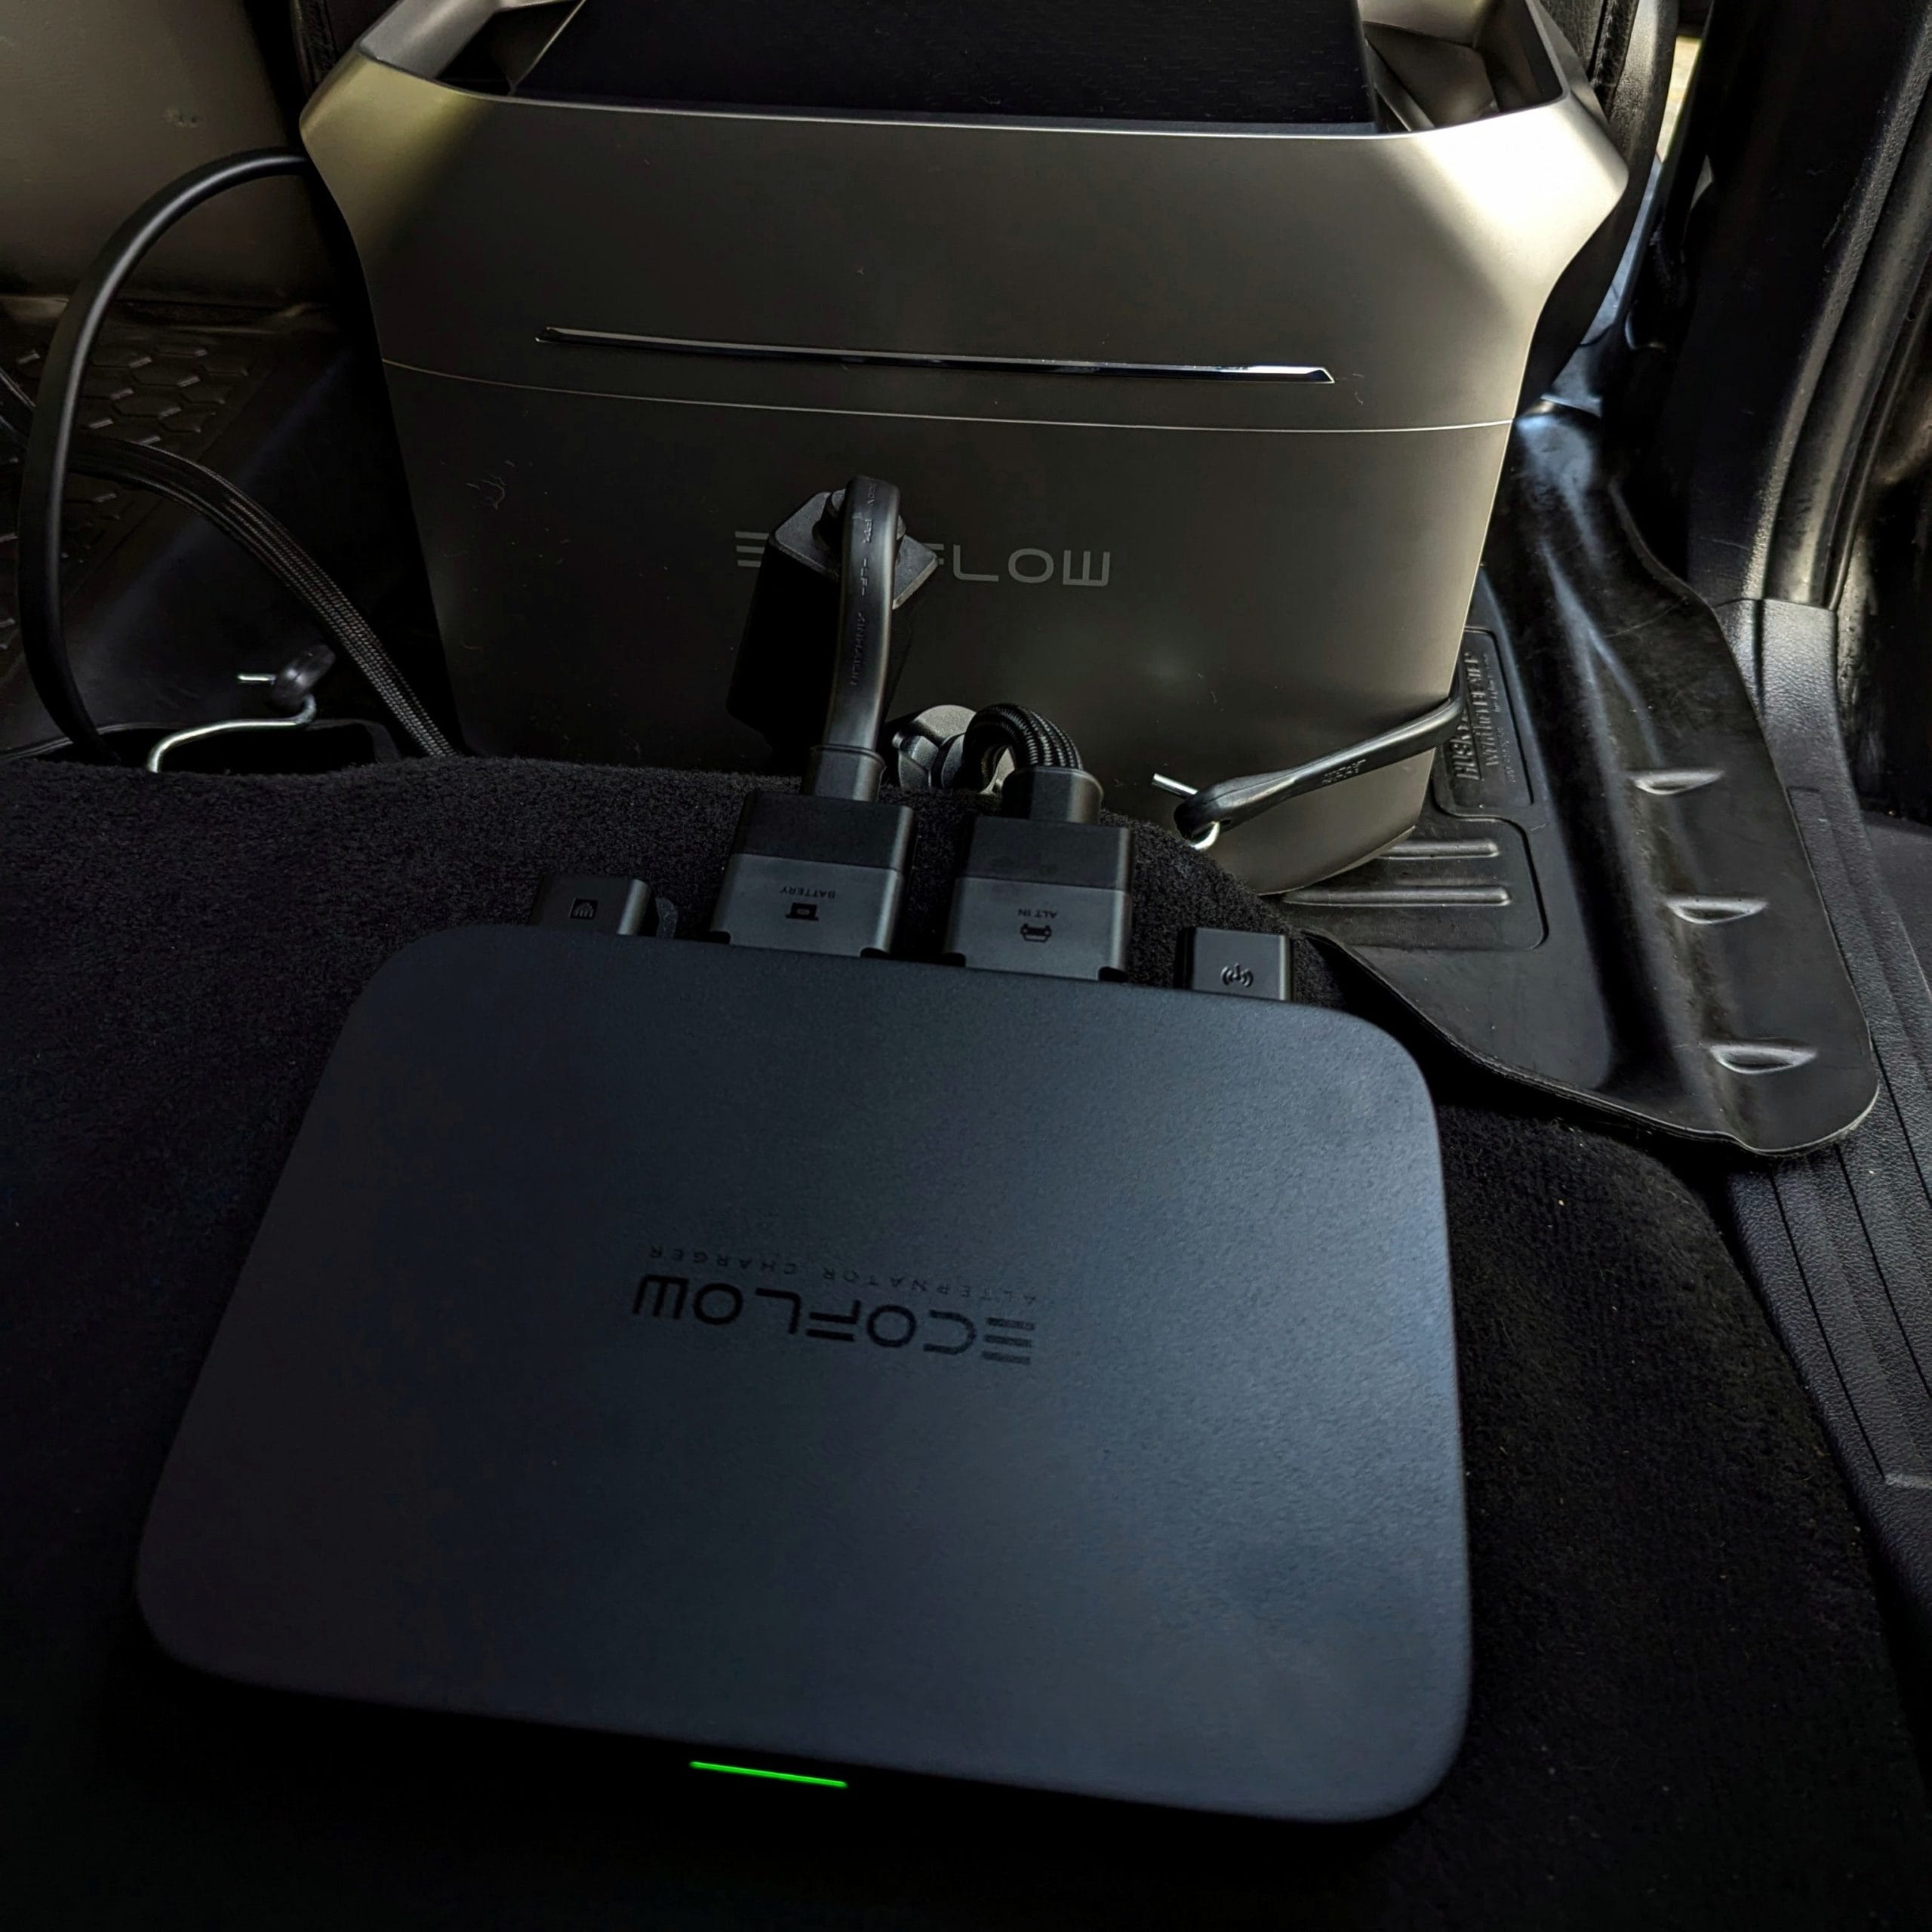
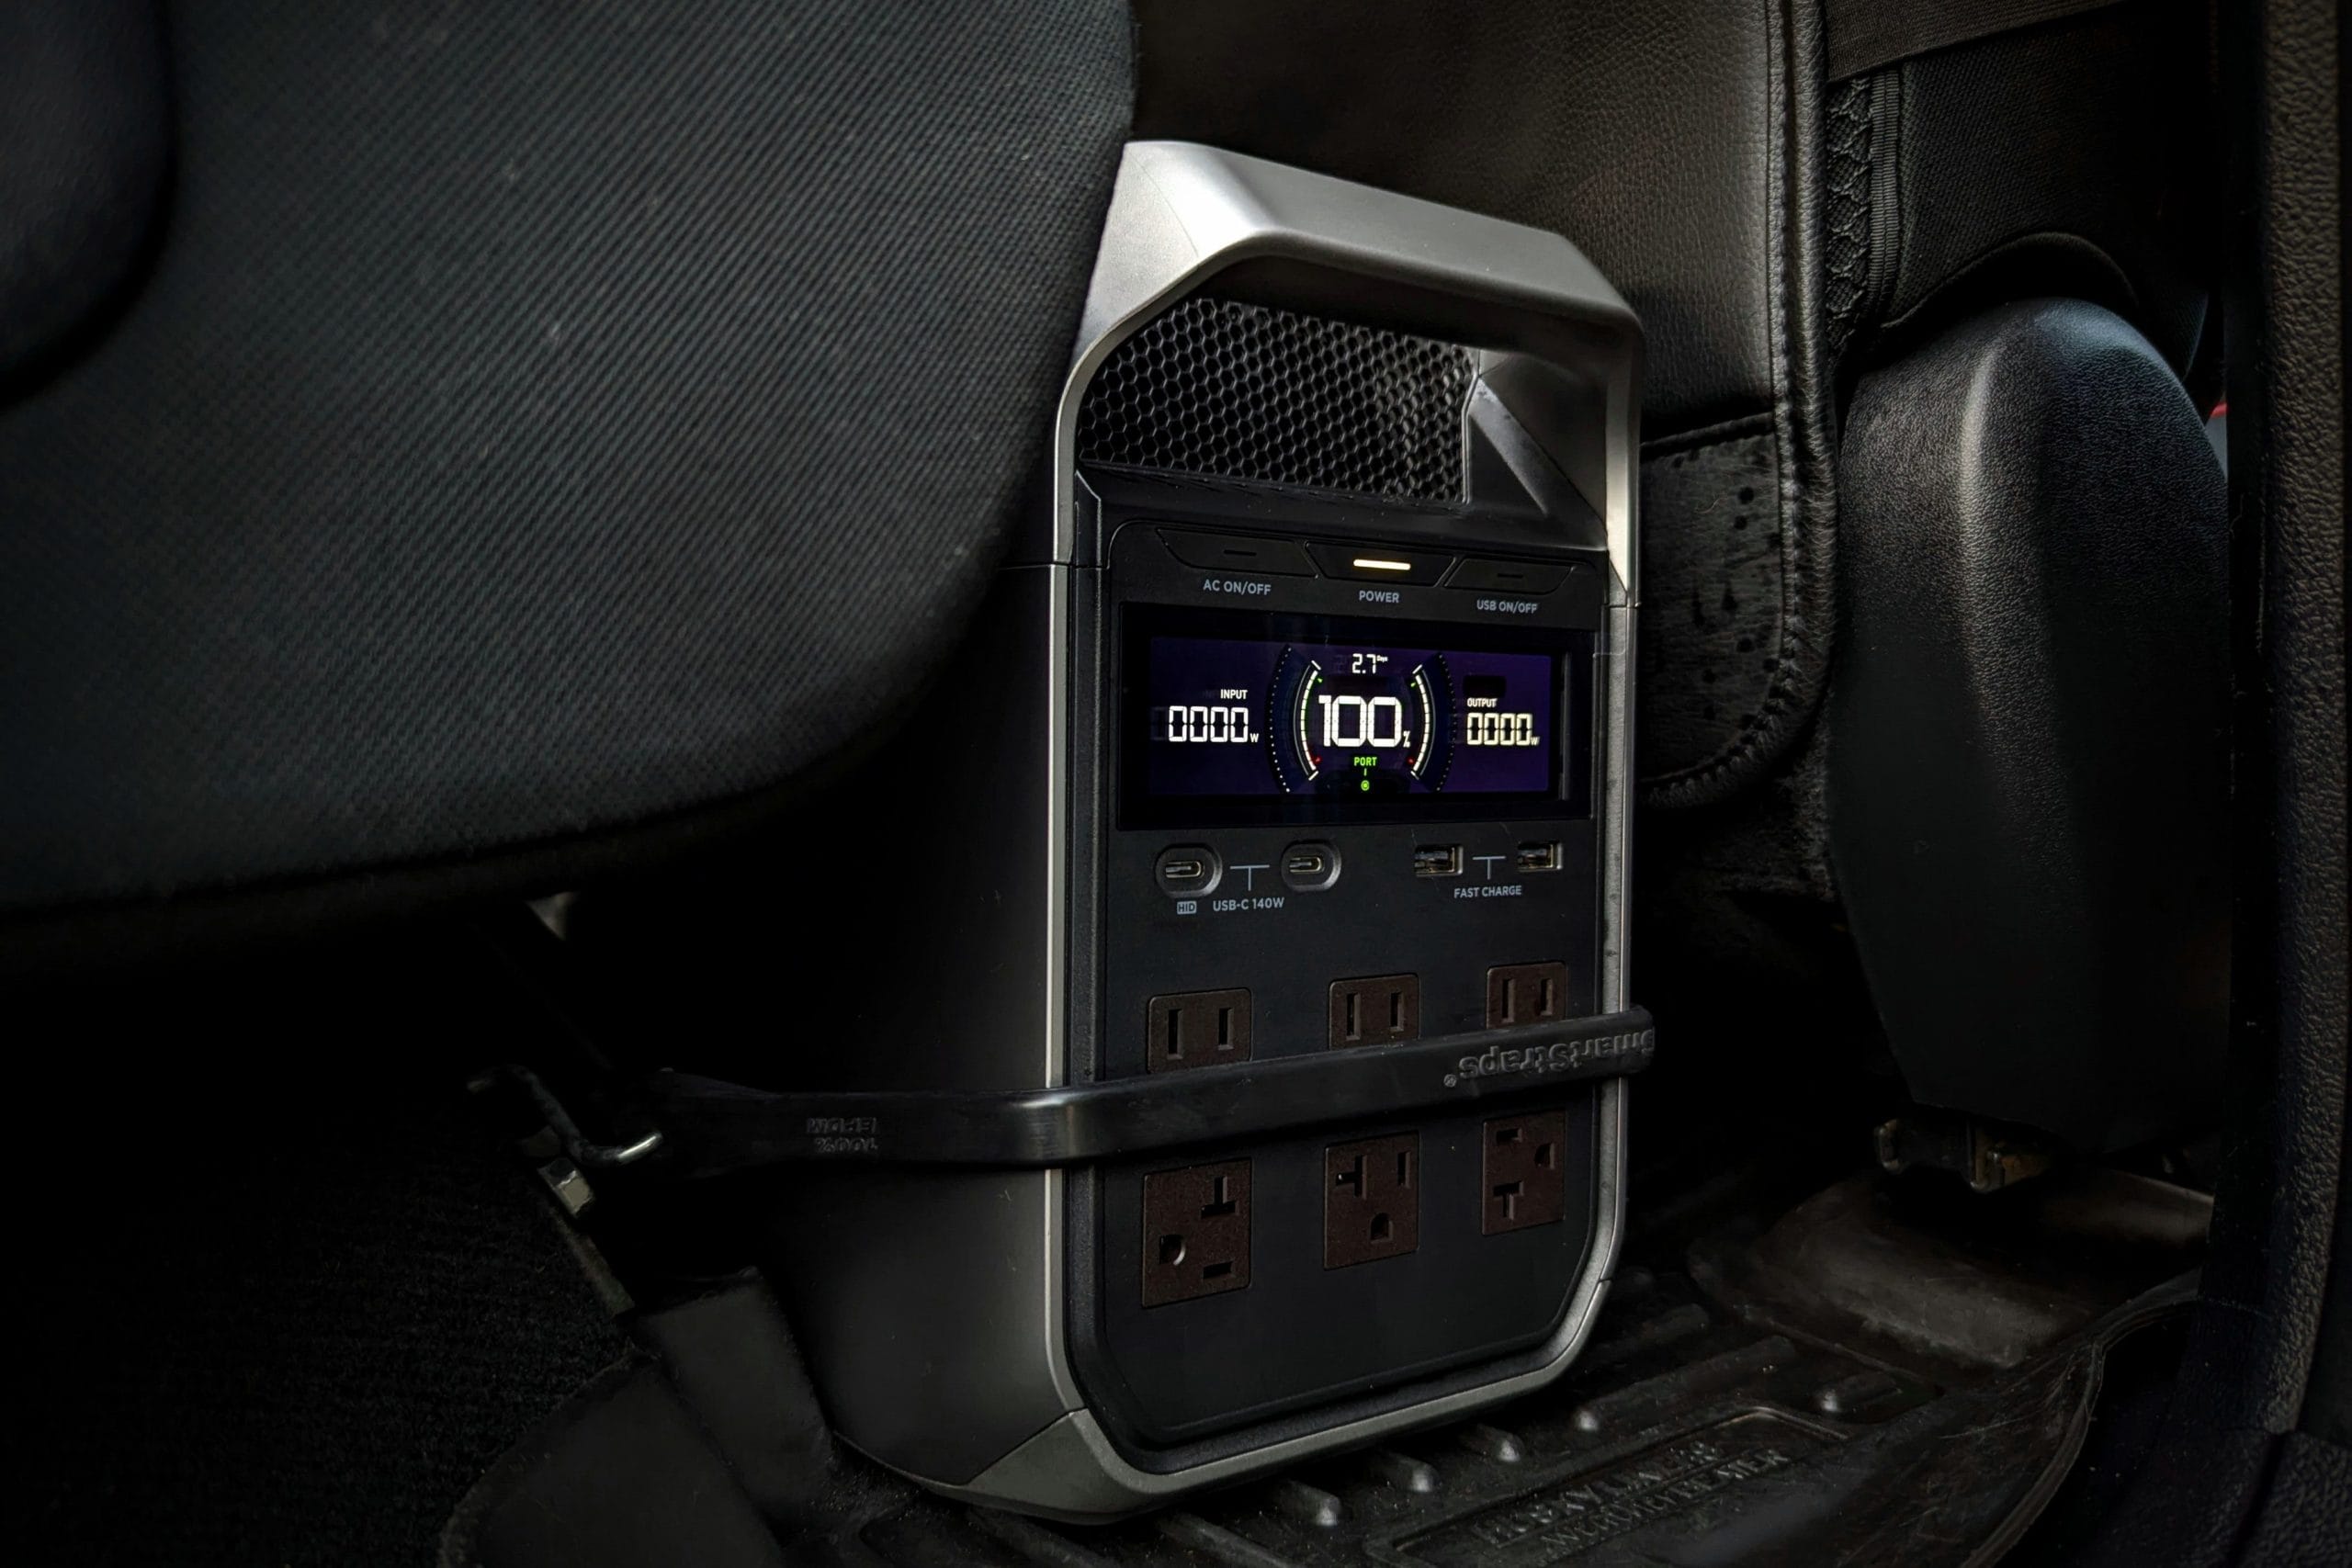
My go to therefore was an Ecoflow Delta 3 Plus unit, coupled with their more powerful 800w alternator charger. This gives me a continuous 1800w of power, 1000 wh, and will comfortably keep laptops, lighting, refrigeration, and so on, up and running!
Using the alternator solution also means simply that by simply driving or even just running the engine I can keep the unit topped up. With a full charge only taking about 1.3 hours, it works out at about $3 of idlding to top it up.
Another benefit is this system is it can go both ways. I can reverse the flow of the charge so the Ecoflow is helping my battery as well. Getting a flat battery while in the middle of nowhere sounds very distressing and this provides some insurance against that.
With me having made my choice, I placed my order. I was lucky to get my unit and charger at a fantastic price, costing even less than even advertised. It promptly arrived only a few days later.
Installation
So I felt really familiar with how to setup such a system, given I spent my youth installing many car amplifiers! This is pretty much exactly the same idea. A high gauge power cable is run from the battery into the interior of the car, where we can connect it to the Alternator charger. This unit then in turn feeds and draws from the Ecoflow Power Generator, and is all controllable with a fancy Bluetooth phone app.
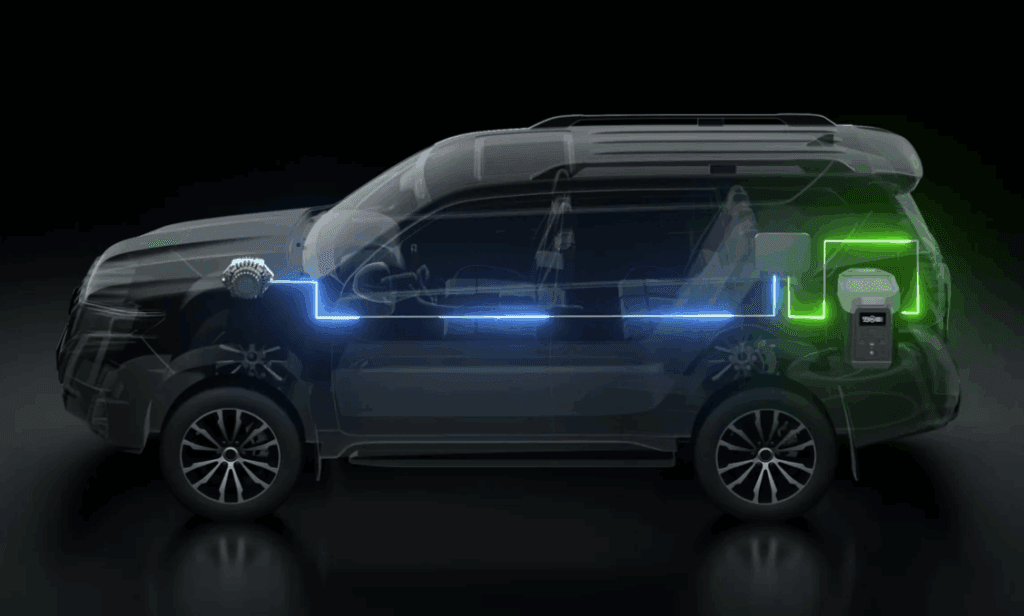
First I needed to determine the placement of the Ecoflow. I decided behind the passenger seat was the best spot. I felt this was good use of that space, and keeps the unit in the middle of the car for both power needs in the front and the back. So with that in place, the next step was to install the wiring.
The Alternator charger comes with a quite a hefty cable loom, Dual 4 gauge and quite stiff. from prior experiences I felt this might be a touch on the difficult side.
First up was getting the cable through the firewall and into the engine bay. This part can really suck on some cars, but it wasn’t to bad this time round. The grommet was easy the reach, and using a draw wire I was able t o pull through the loom into the engine bay and to the battery.
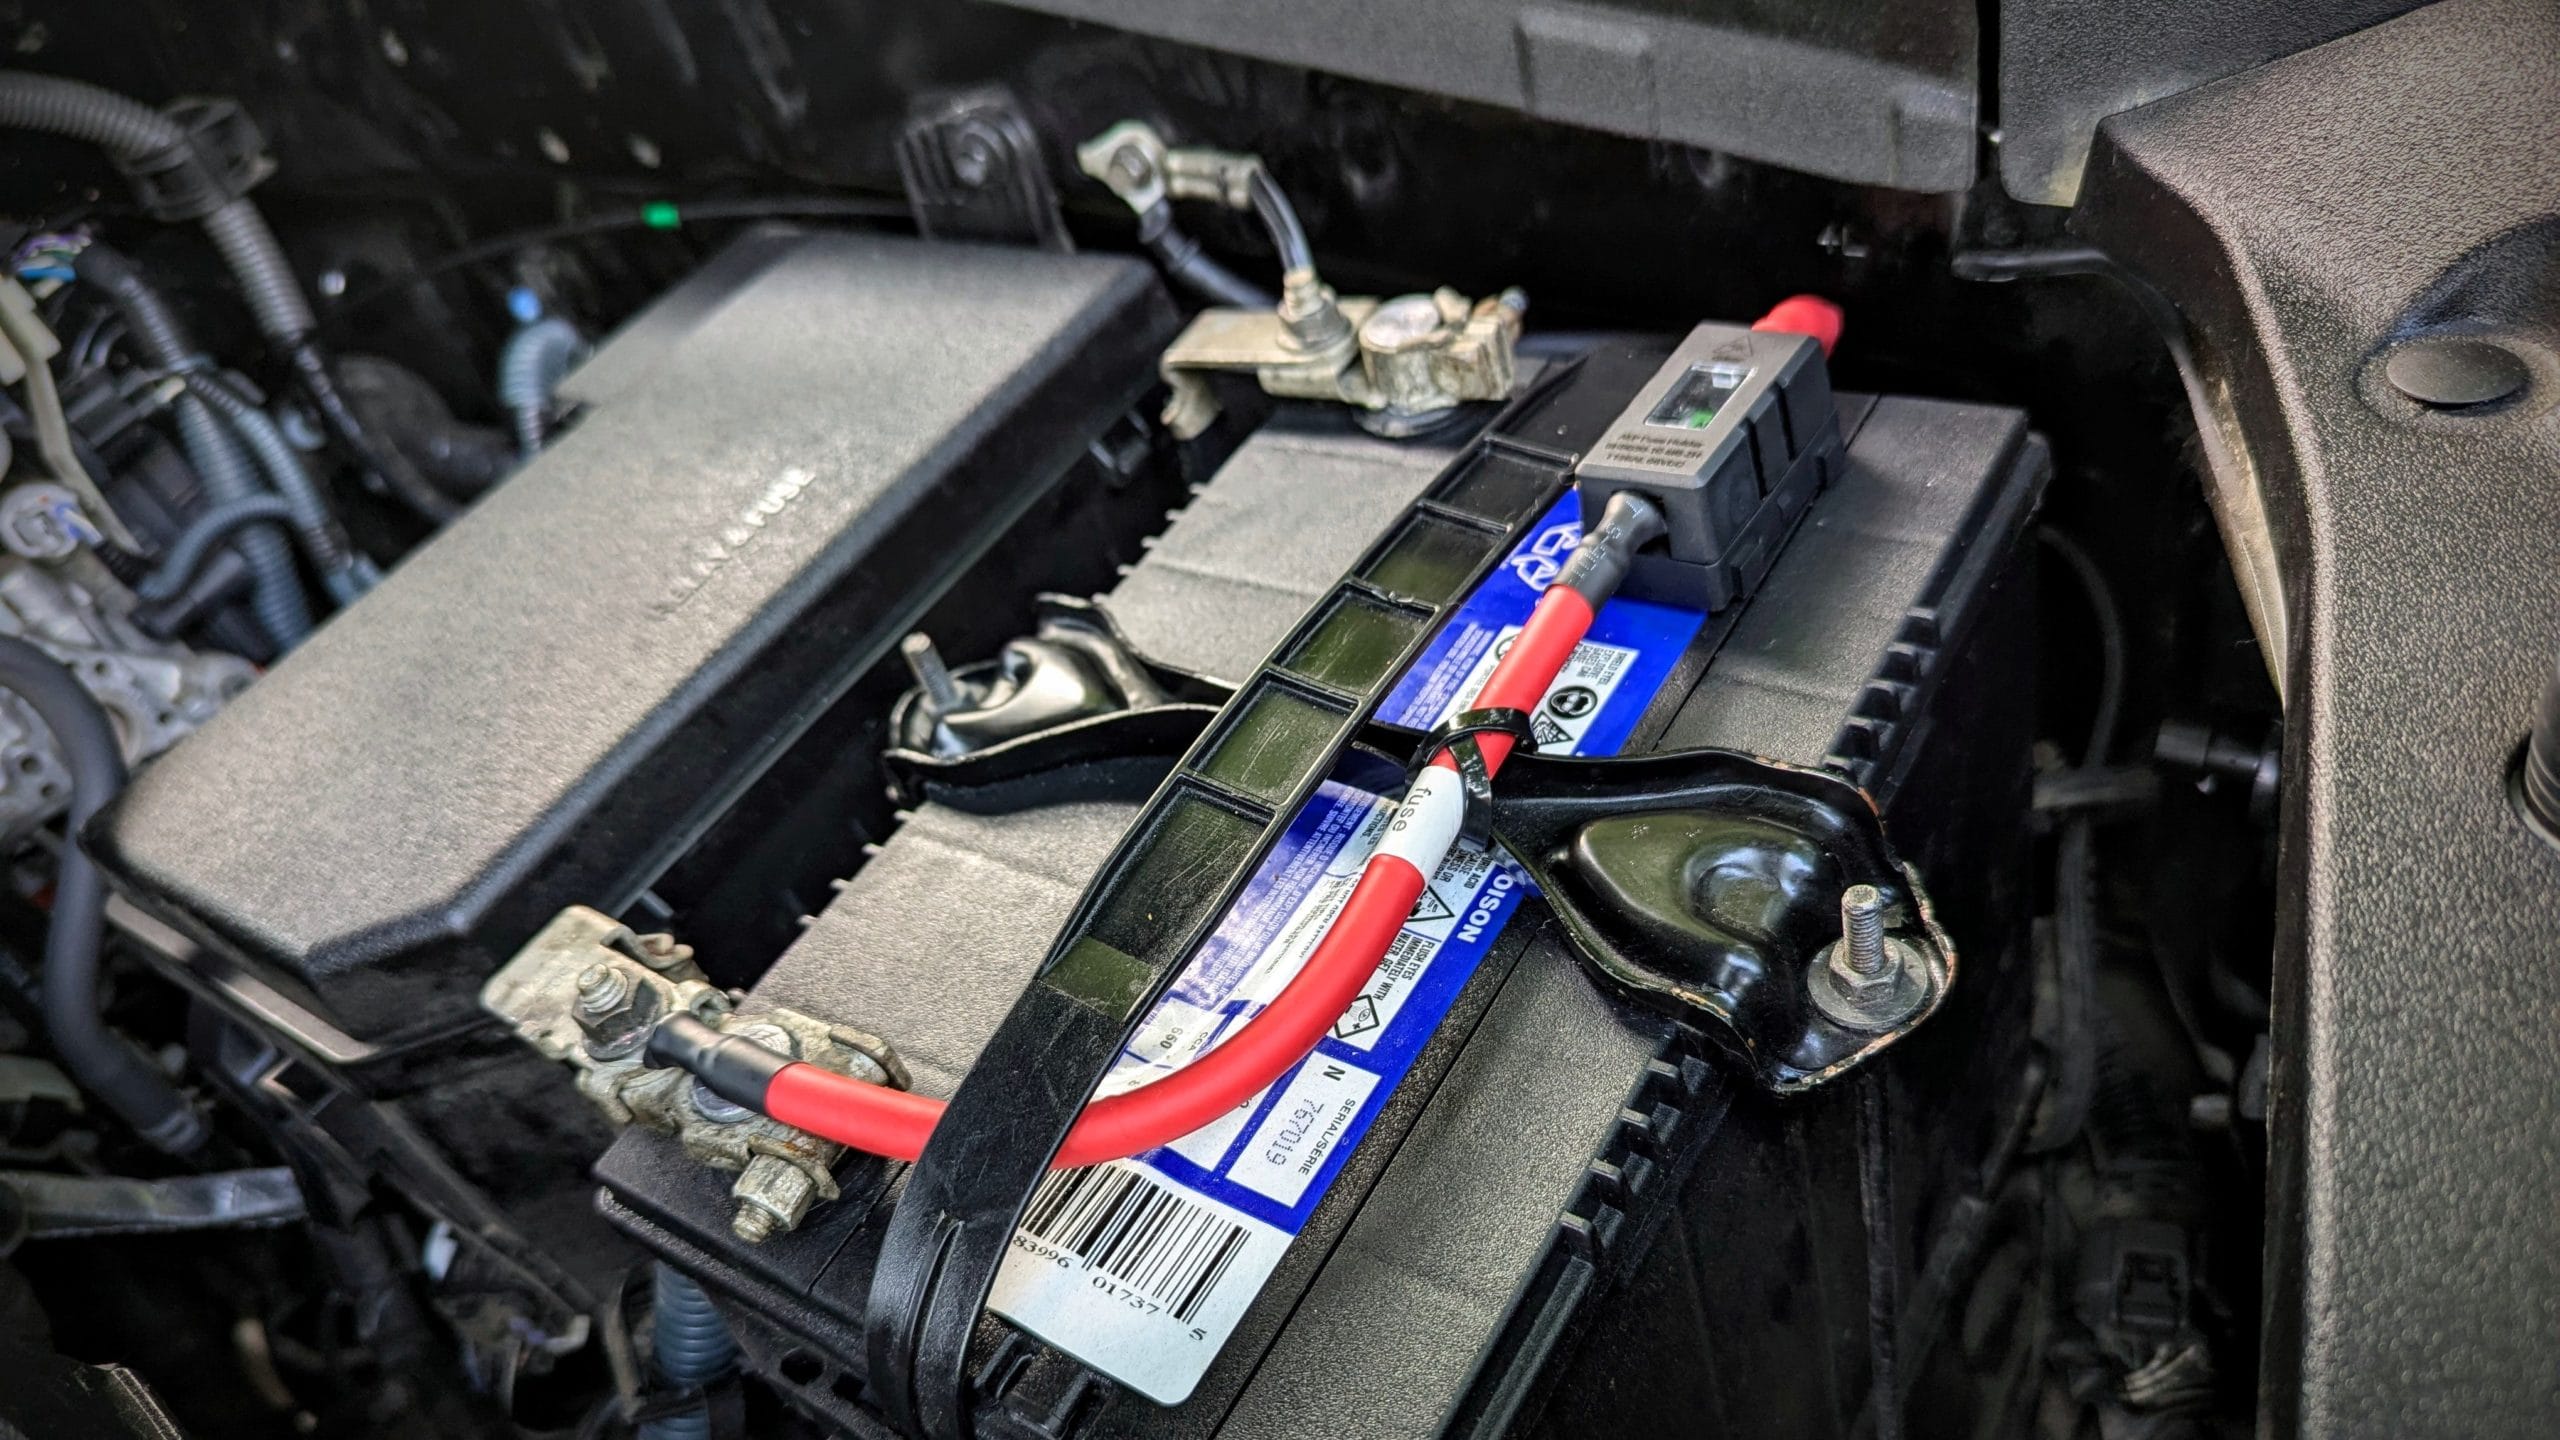
In the picture above, you can see my final solution with the cable redirecting from the terminal to the edge of the engine bay, where (if you have a keen eye) I also have tapped into the earth on the car body. I’m not 100% happy with this as it is, but I have plans to upgrade the terminals at which point I’ll redo this setup.
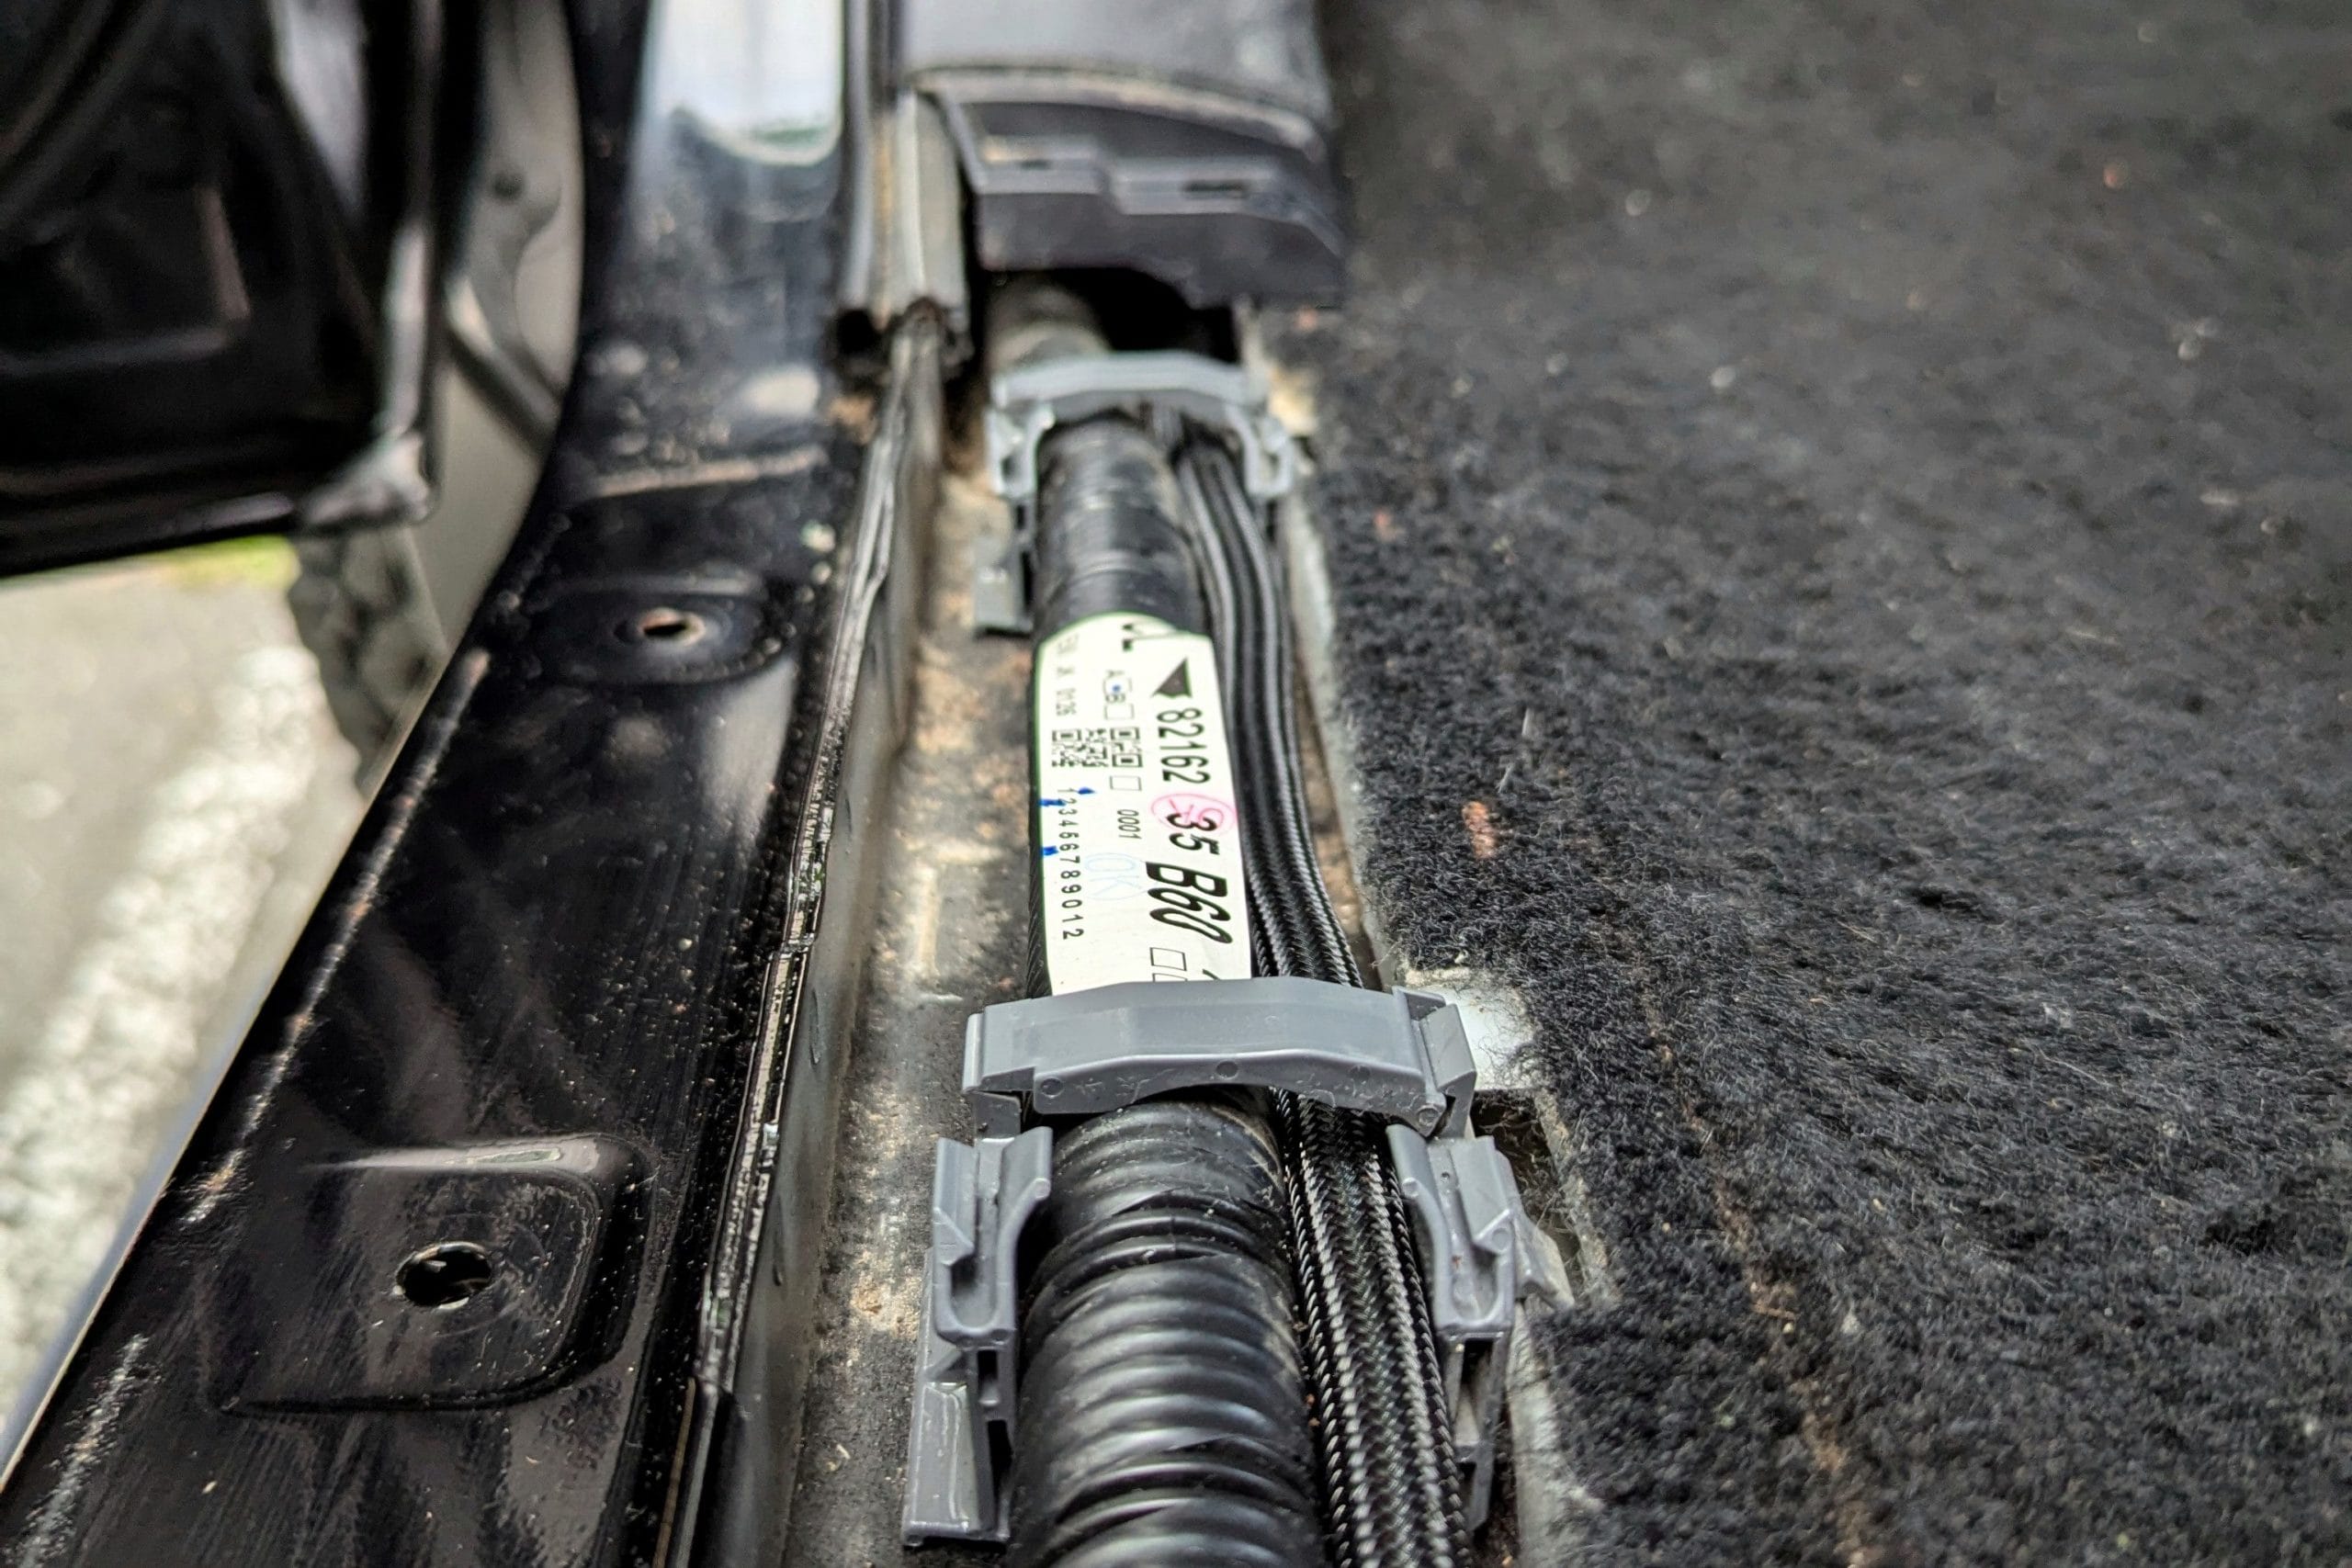
With the cabling now inside the cabin, I need to lift the trim and run the cable down the sills. This is where hands get sore. Lots of poking, prodding, pushing and pulling, trying to make the cable fit where it doesn’t really want to. Do it wrong – and the covers won’t be able to clip back into place. Luckily there was just enough room, and managed to hide the cable all the way to the backseats.
With the cabling now able to run under the rear seats to the Ecoflow unit, I opted that I would place the alternator charger in a space there. I might move this in future but for now that worked well for me. A quick test showed everything was working perfectly when connected.
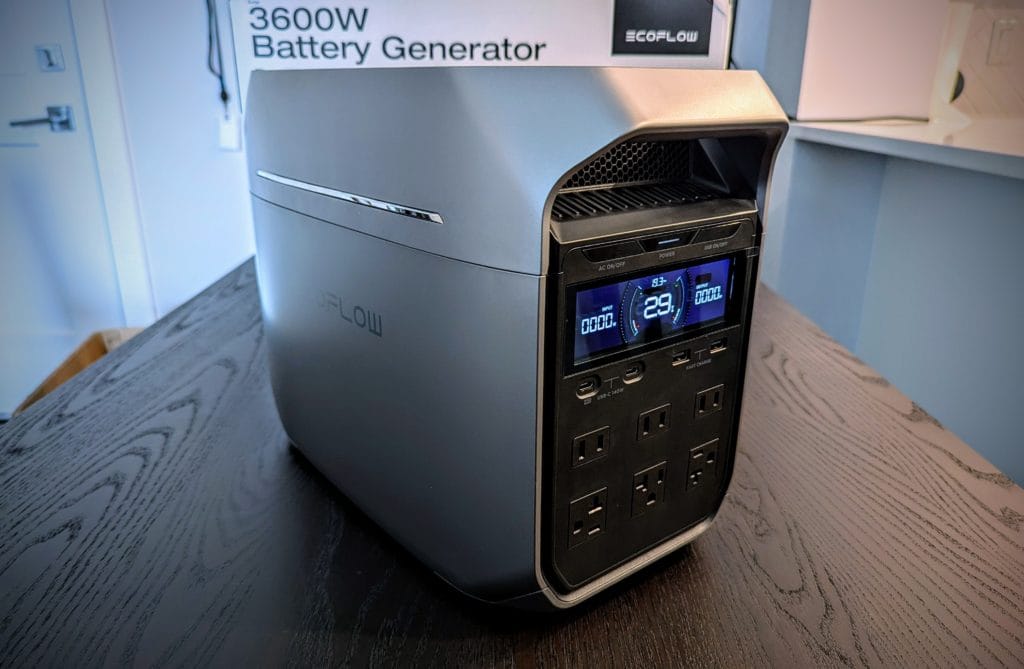
I tied up the cabling, folded down the seat and secured the Ecoflow into place. The setup is complete! 1000Wh of AC power in the car, whenever need it, for whatever I need!
Next up is constructing the bed platform, and already have some made a little bit of progress in that area. Expect a post on that coming pretty soon!