

Given the remote nature of the locations I wanted to explore, I needed a good quality 4Runner Camping solution. I was not too keen to put myself in a ground tent with some of the wildlife that’s around. For your typical bear, I’d probably be akin a snack in a wrapper.
After some thought about a setup, sleeping inside the car seemed to be the best solution. Not only is it very secure, It’s also discrete enough allow me to stay in more populated locations, like towns or even within cities.
Bed Platform RnD
I started looking around what solutions people online had come up with. There was some pretty simple solutions to start, like throwing a piece of foam in the back. This might suffice for a night away, but honestly I was looking to do something a little more. Some of builds on the other hand, were amazing but also too complex. Probably pretty heavy and required some serious carpentry skills. None of them really ticked all the boxes, with my objectives being:
- The bed doesn’t greatly impact my storage space
- Can be permanently setup (so im literally not making a bed every night)
- Allows everything to have a place (and stay there)
- Modular assembly
- Single or double configuration depending on trip needs
In the end I found a solution created by Nick Carver that was very close, and with some minor design changes would be perfect.
Even if you don’t watch the video, You can see from the thumbnail it’s a full platform covering the rear of the car. it’s splits between the boot and the rear of the car, and additionally has a cutout rear passenger on the driver’s side. This was going to be the basis of my design, with the following changes:
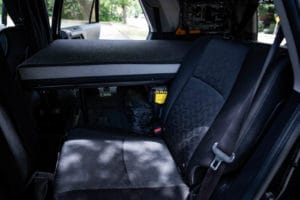
- The cutout needed to be weight supporting
- I want to retain use of a rear passenger seat when in single bed mode
- The height of the platform was going to be lower (since I have a tray in the boot)
- All installation mechanisms should be tool-less. No allen keys or wrenches allowed.
My Design
Of course, the easiest way for me to get a design figured out is to dive into Houdini (a 3D package)! There I was able to explore how this might go together. I quickly knocked up the shapes and thought about design changes to achieve what I wanted.
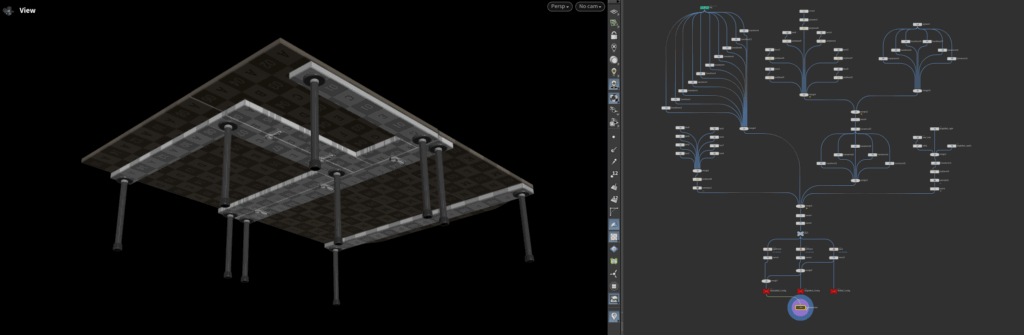
Here is what I came up with. It provided a roughly to scale concept of how it would work. For the exact build specs, that would get figured out on the fly during the build. Drop me a message if you want the file and I’ll glad send it to you.
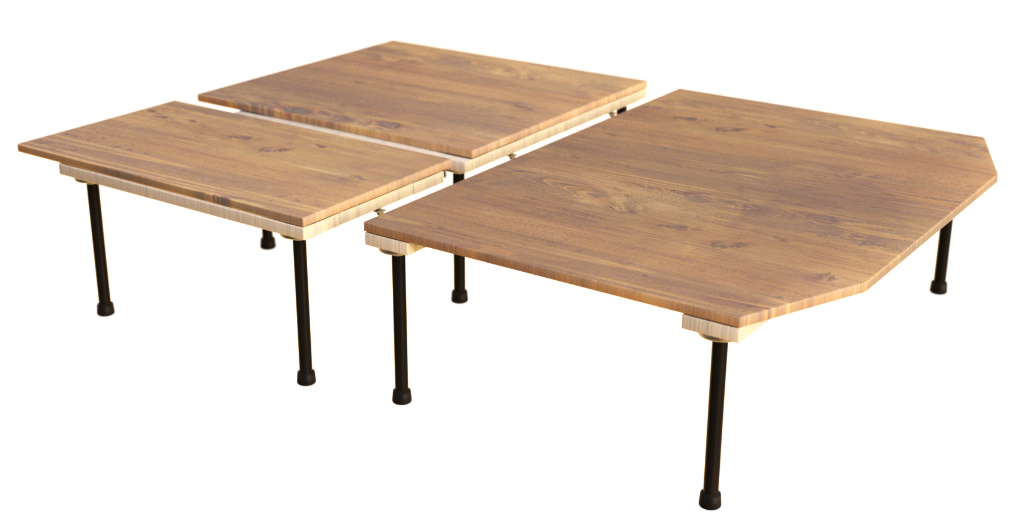
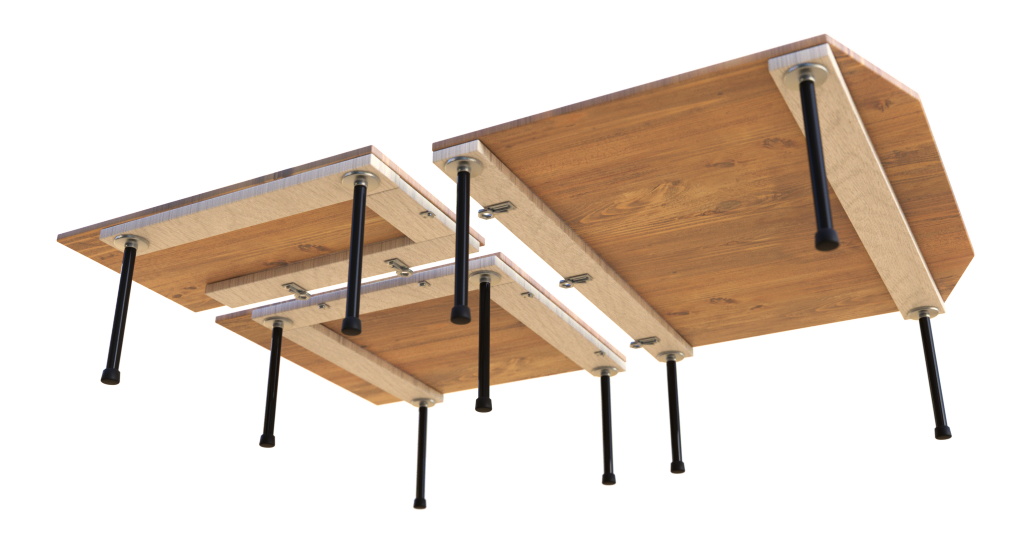
Top View
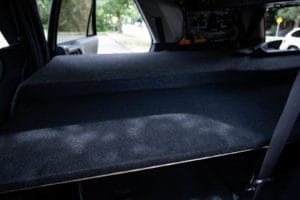
Following Nick’s base design. A large rear section, a front section split according to the seat configuration. This matches well for a typical single bed size, or expands wider to create a twin setup.
Underneath View
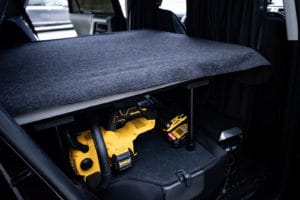
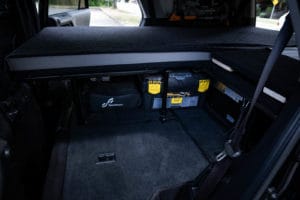
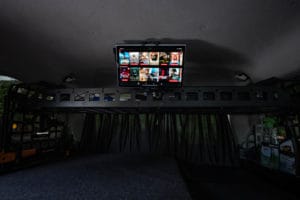
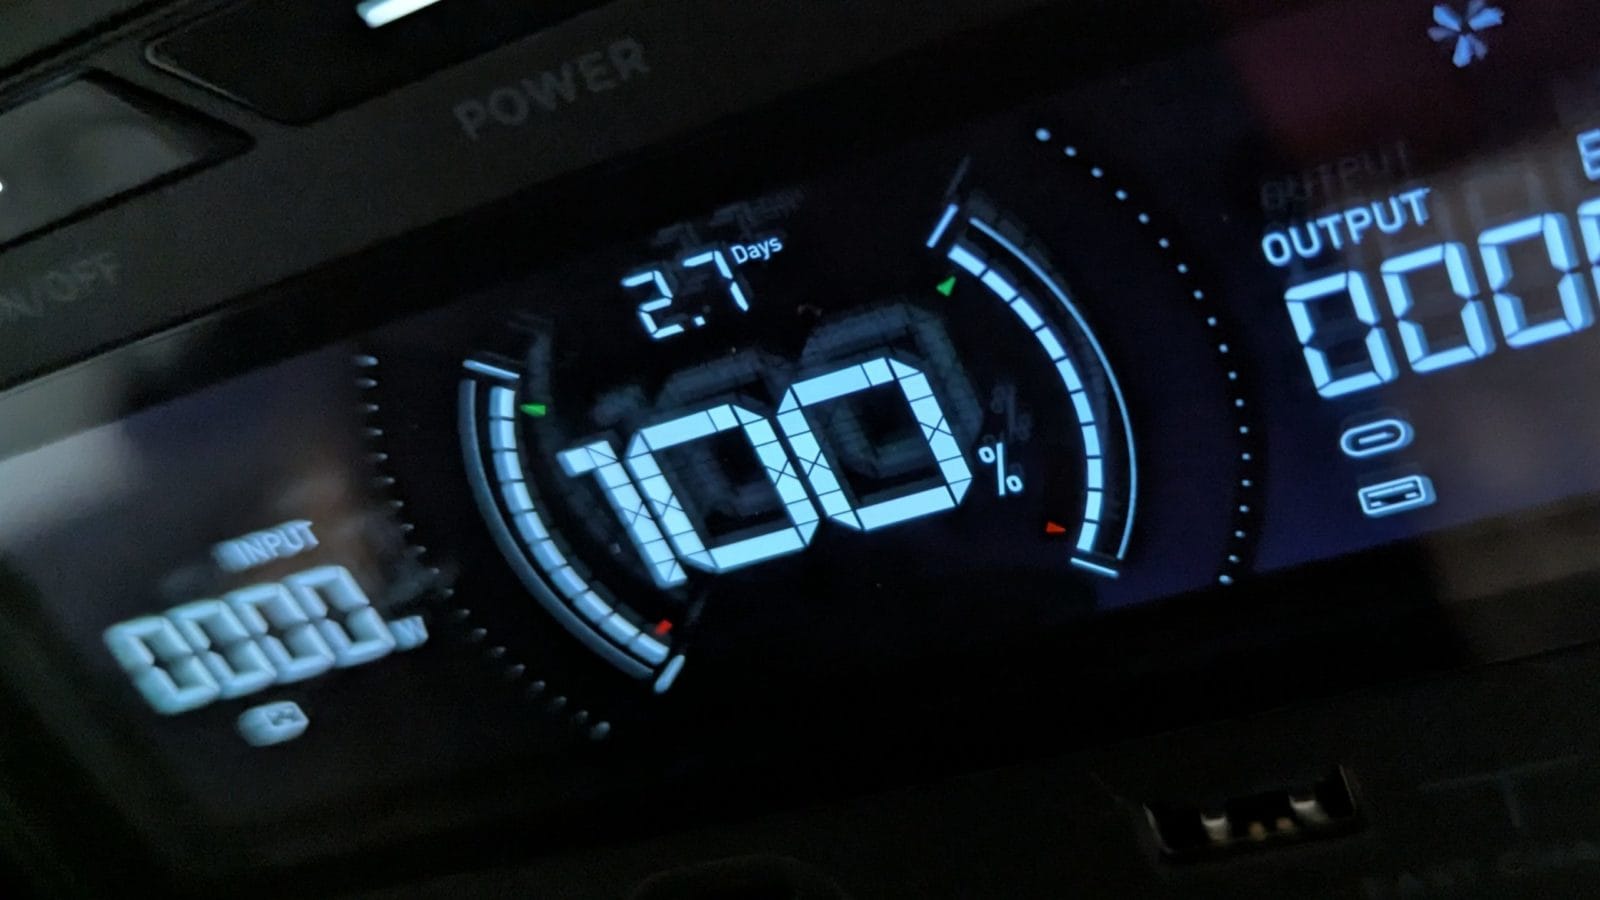
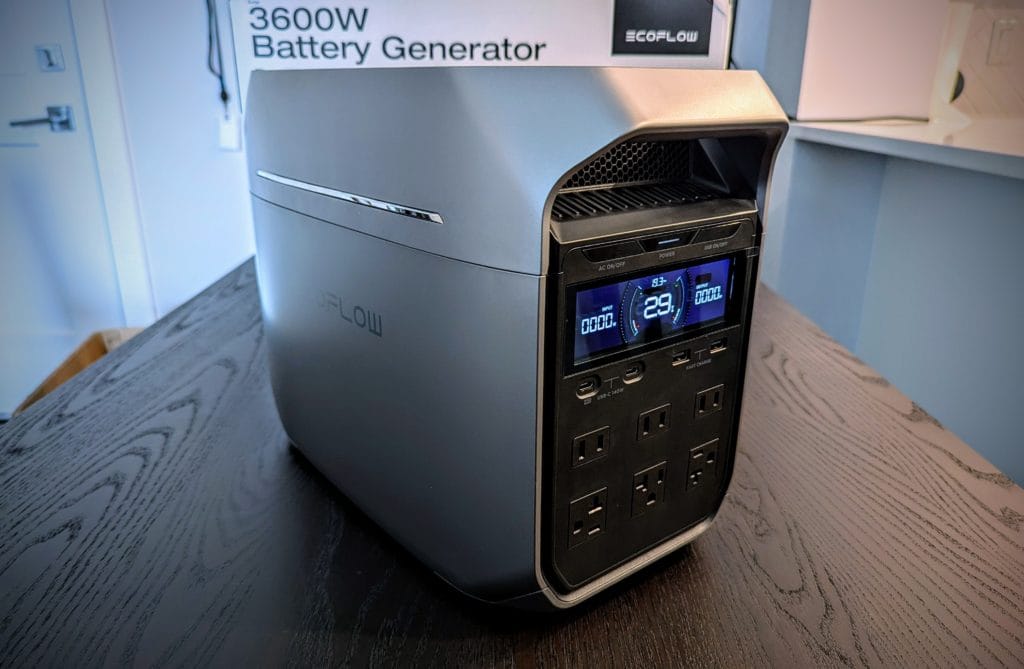
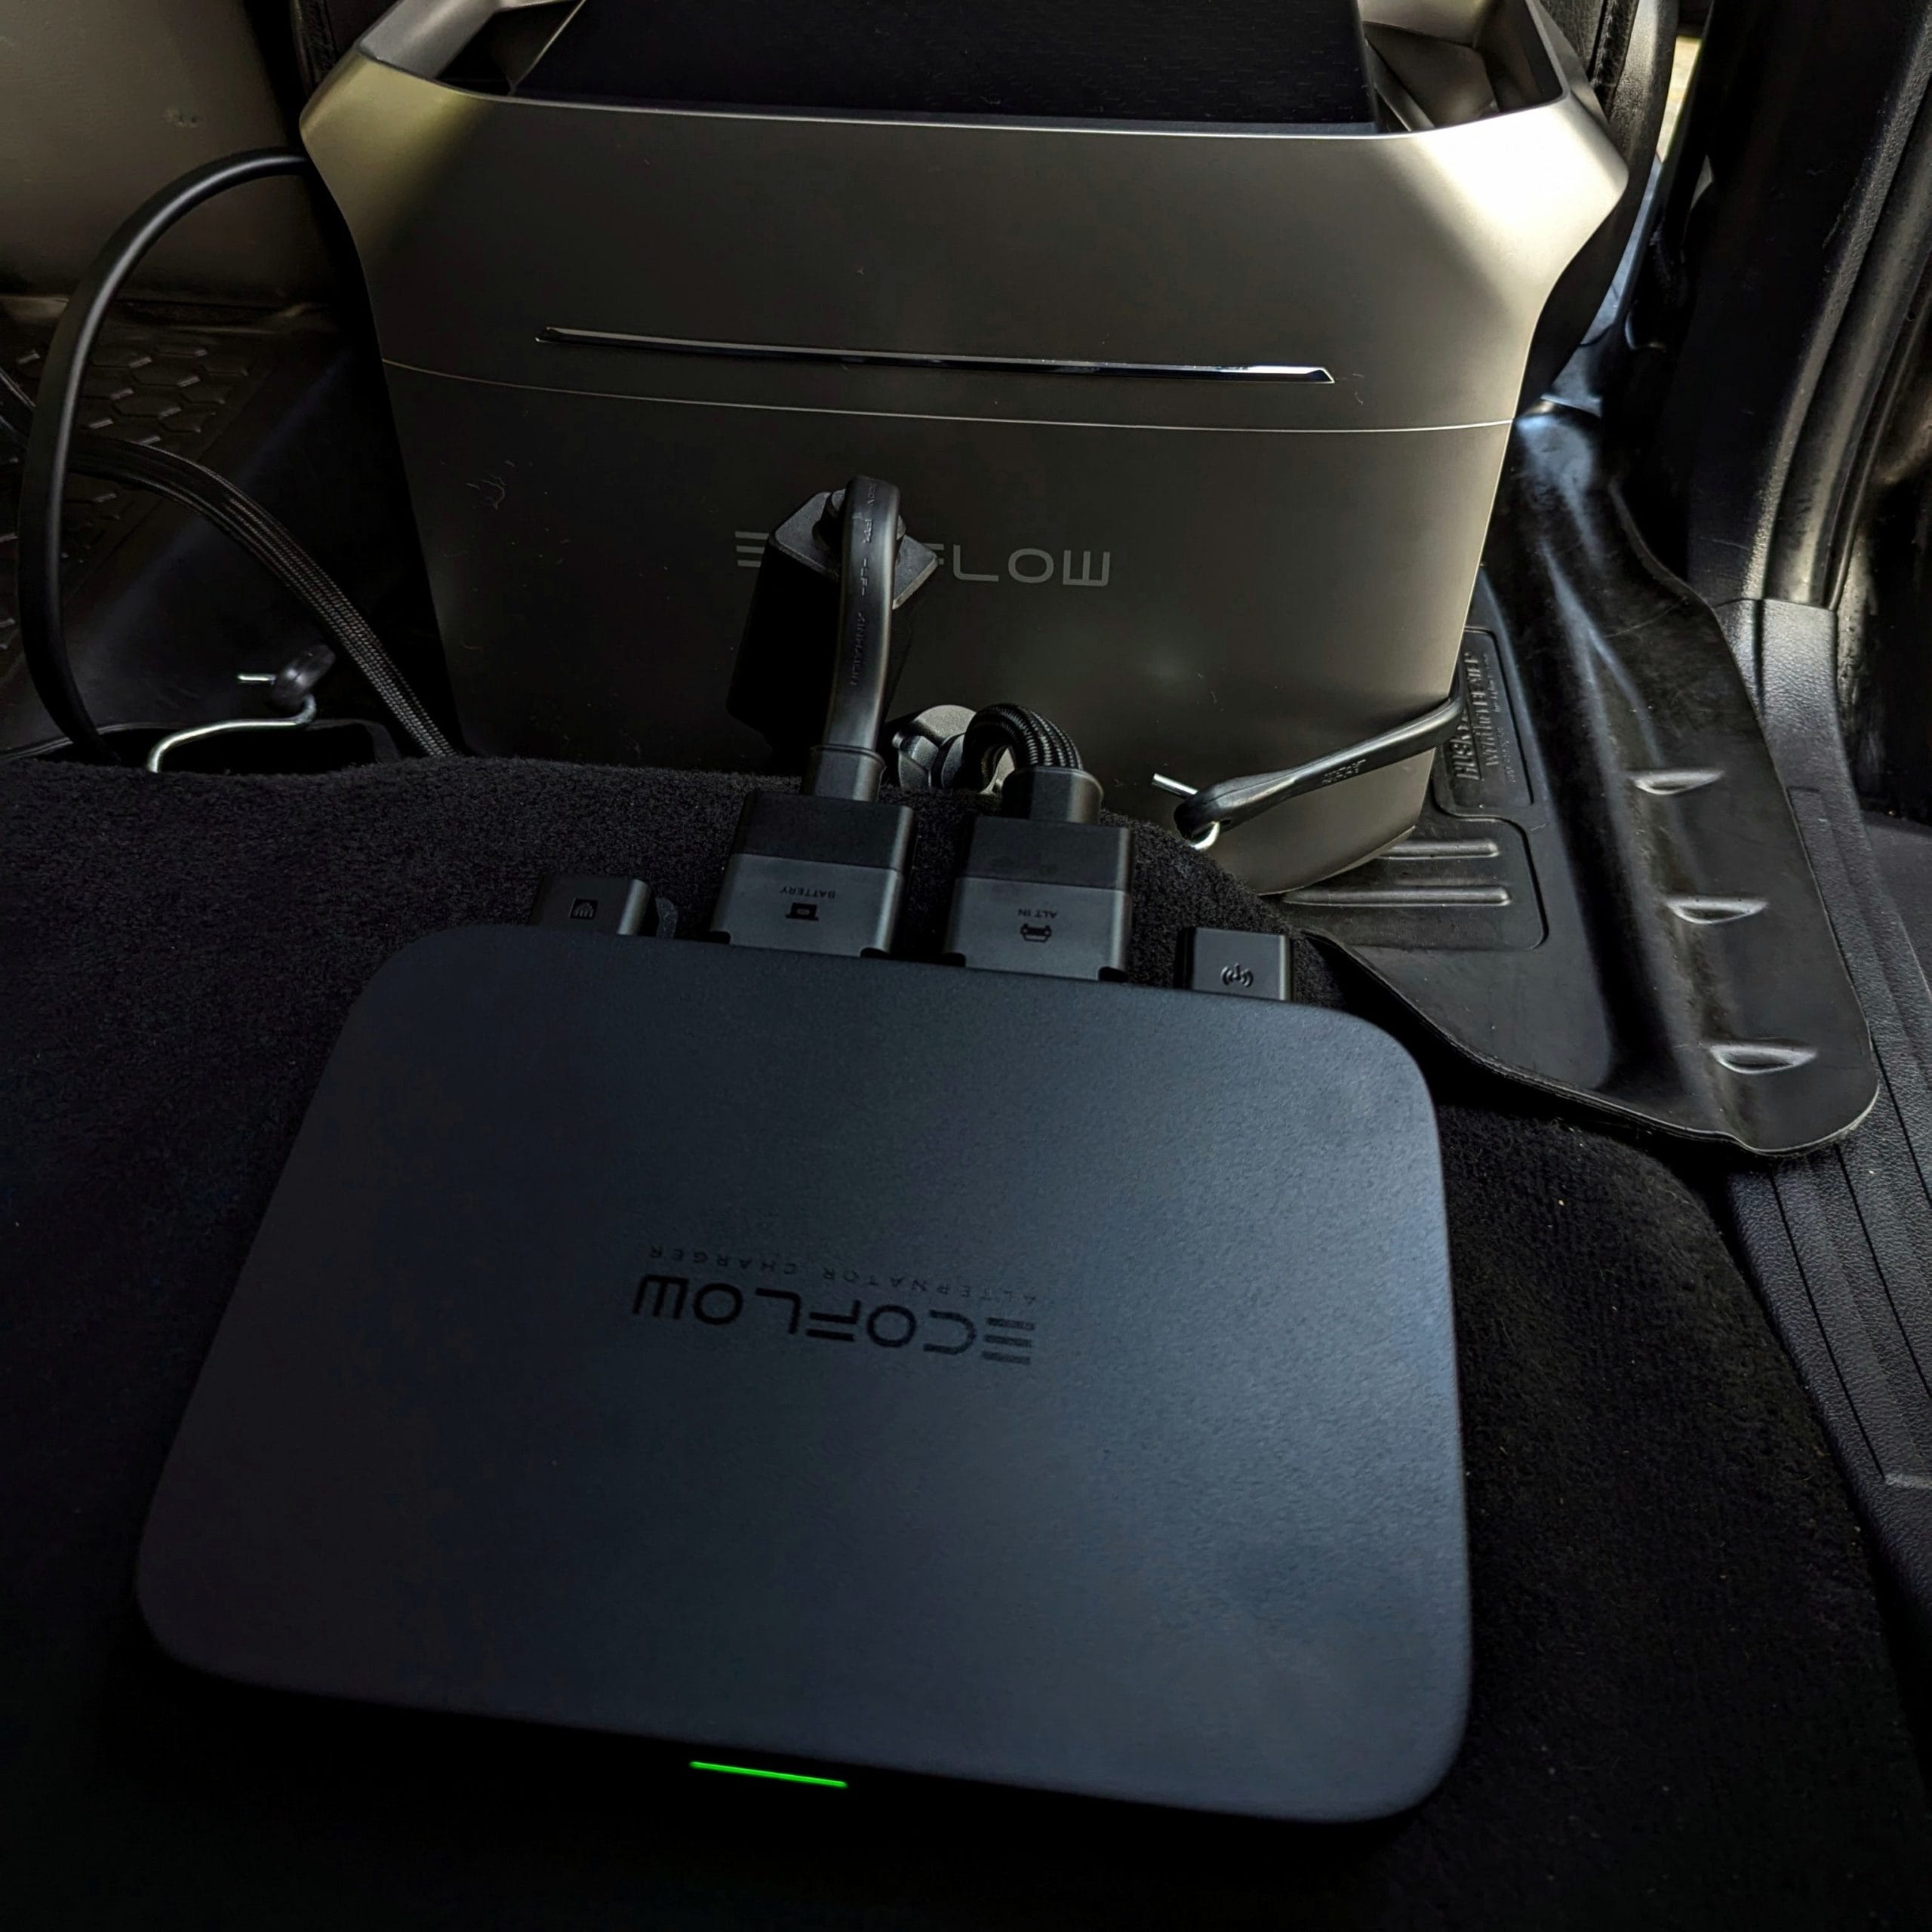
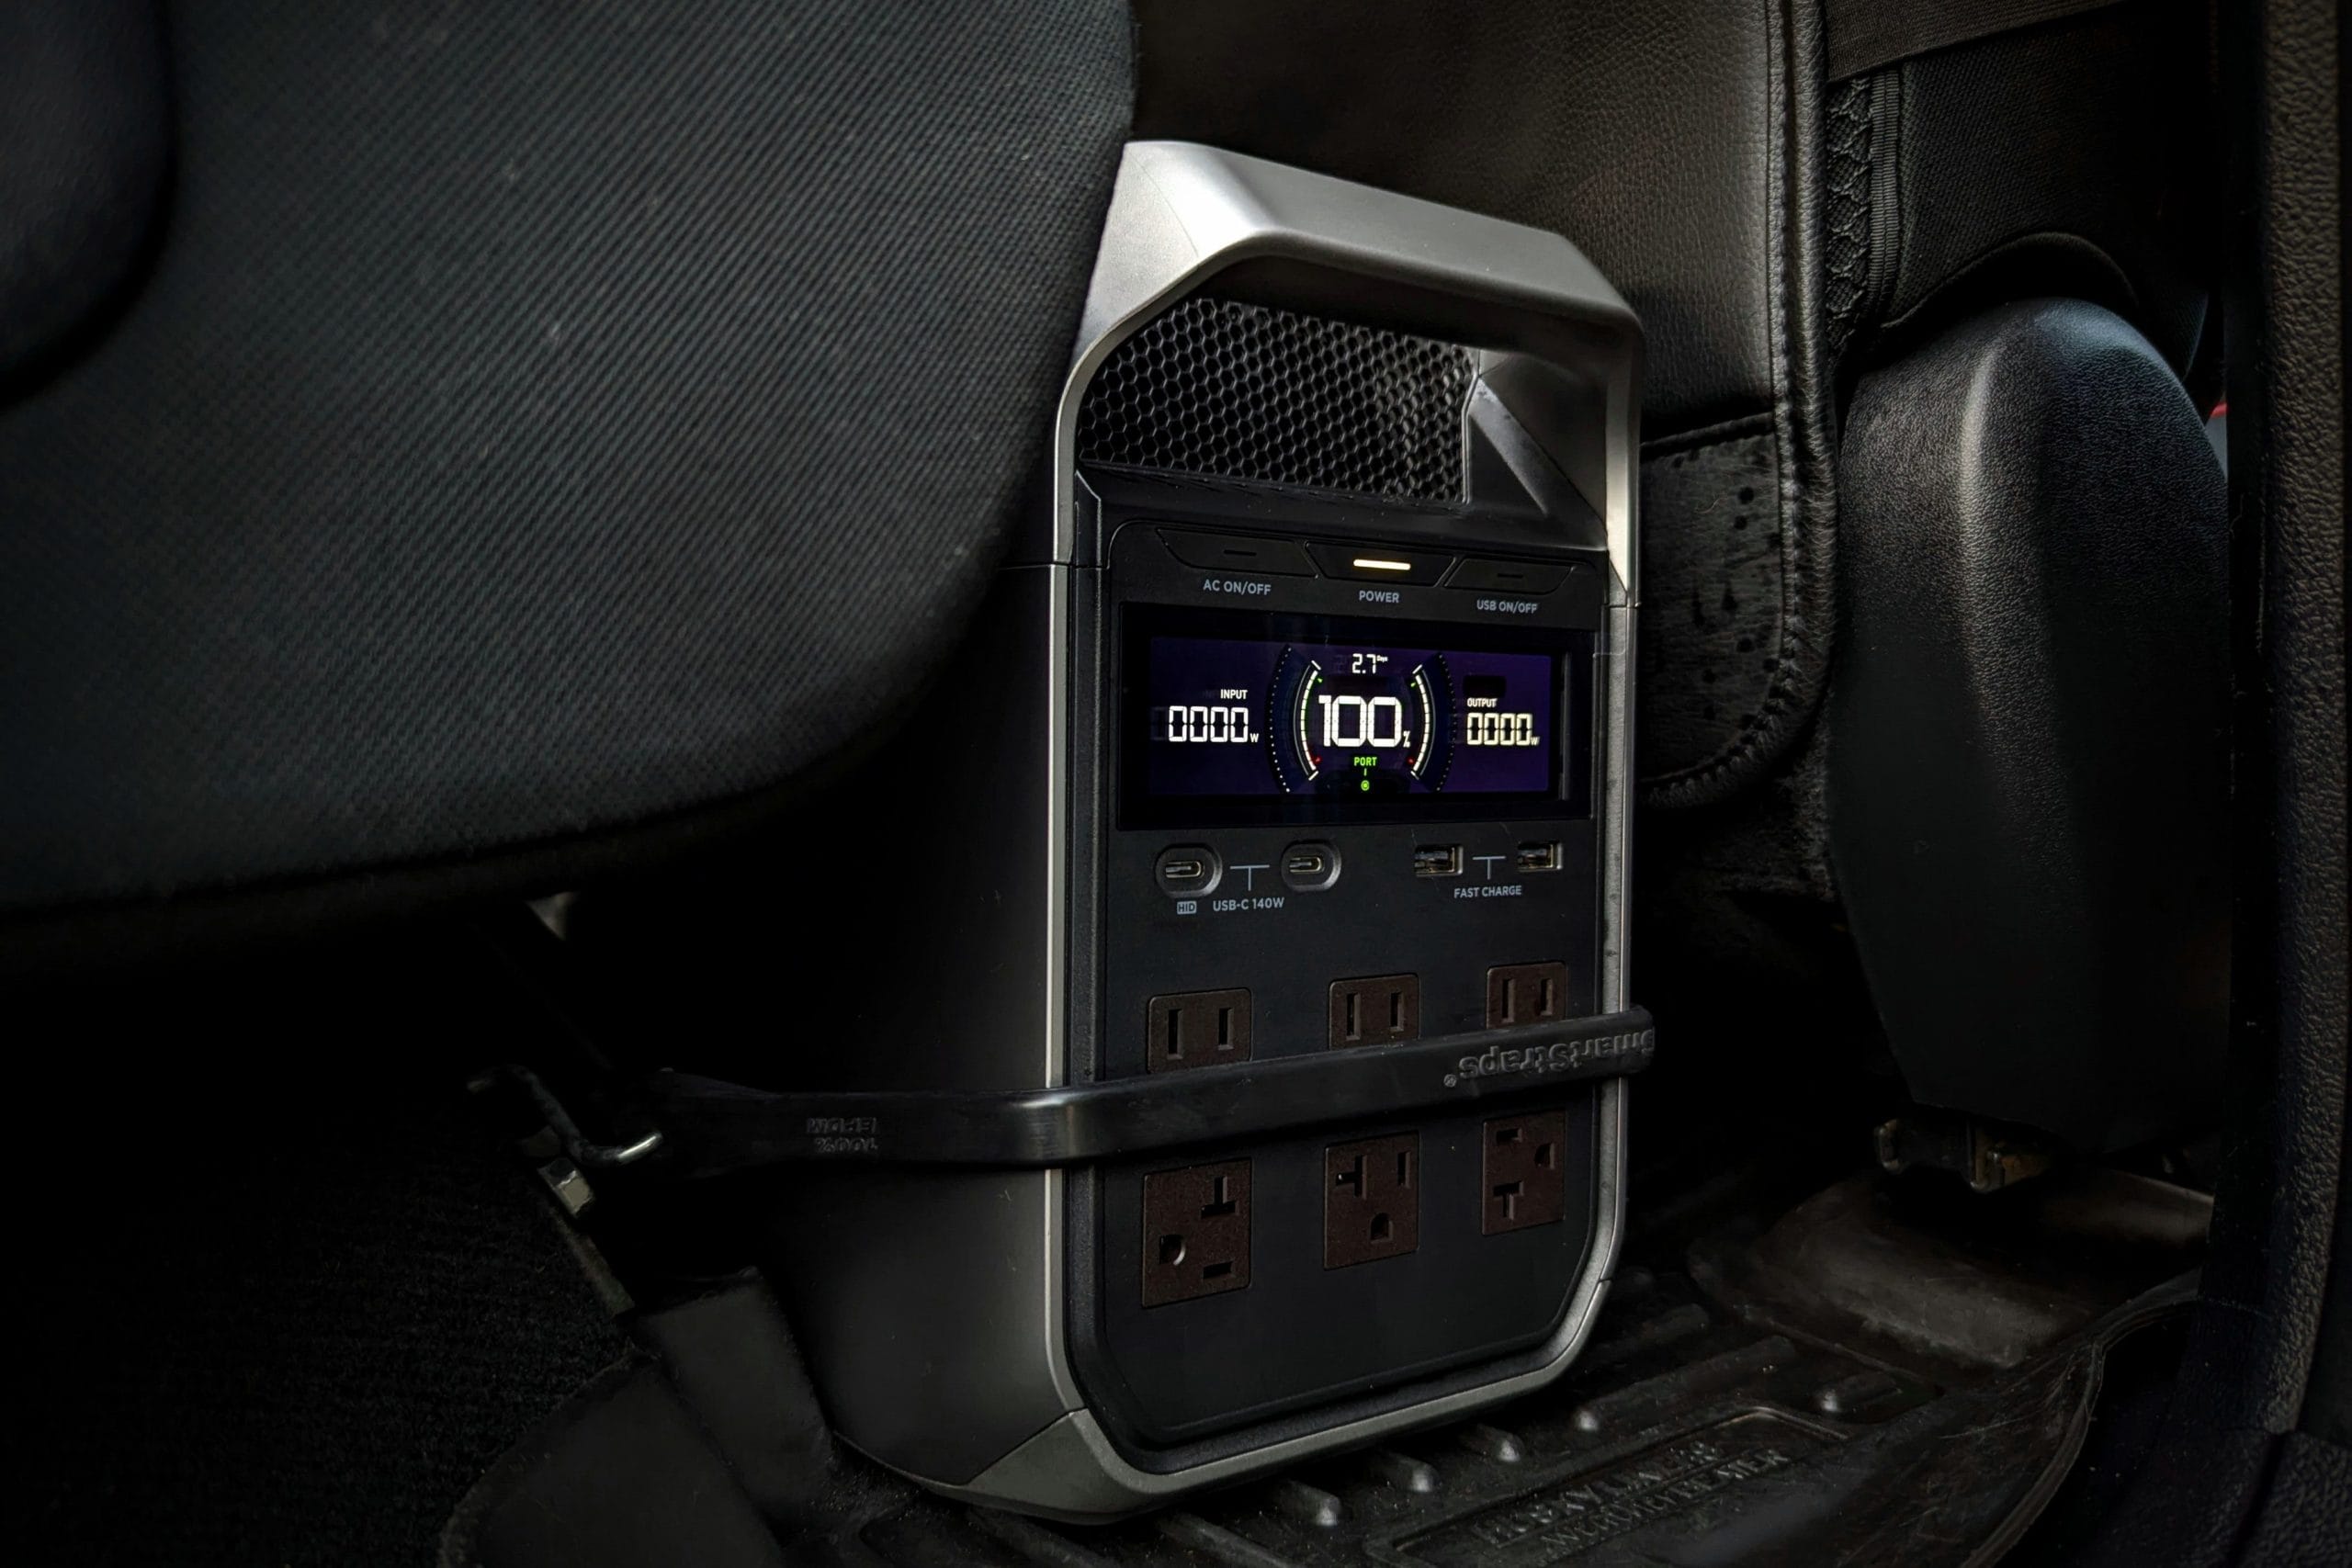
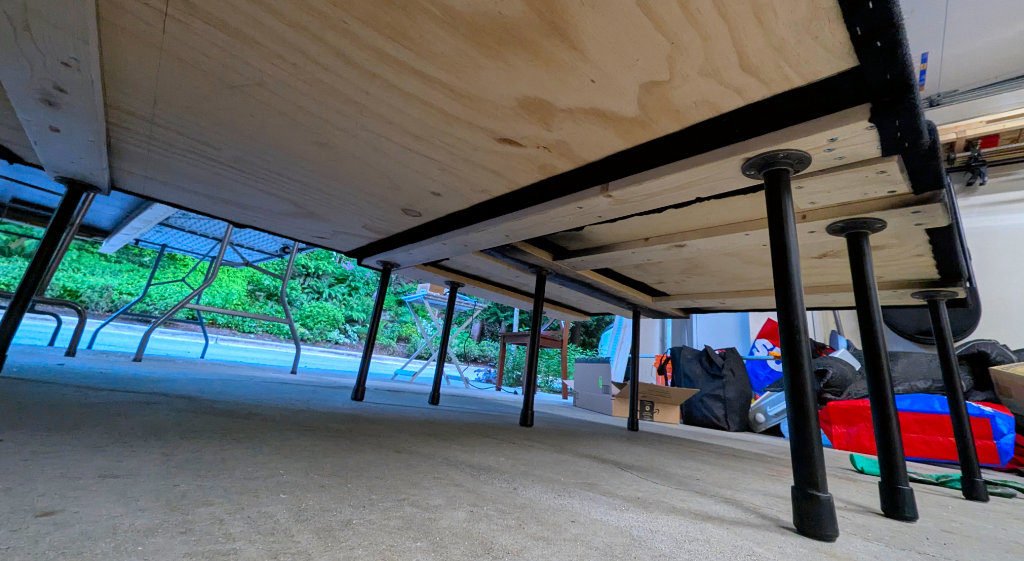
Underneath is where things get a bit different, in particular with the extension for a twin sleeping base. The smallest piece now has 2 supporting legs, so it can hold weight. The legs along the entire front (left side of screen) are set back from the edge, as to remain over the folded down seating, rather than overhang and go to the floor. That space is then uninterrupted so it can be used for other things (like my Ecoflow!)
Strong clips pull all the pieces together, making the whole unit rigid and ensuring the extension edge stays together (more on that in the next picture).
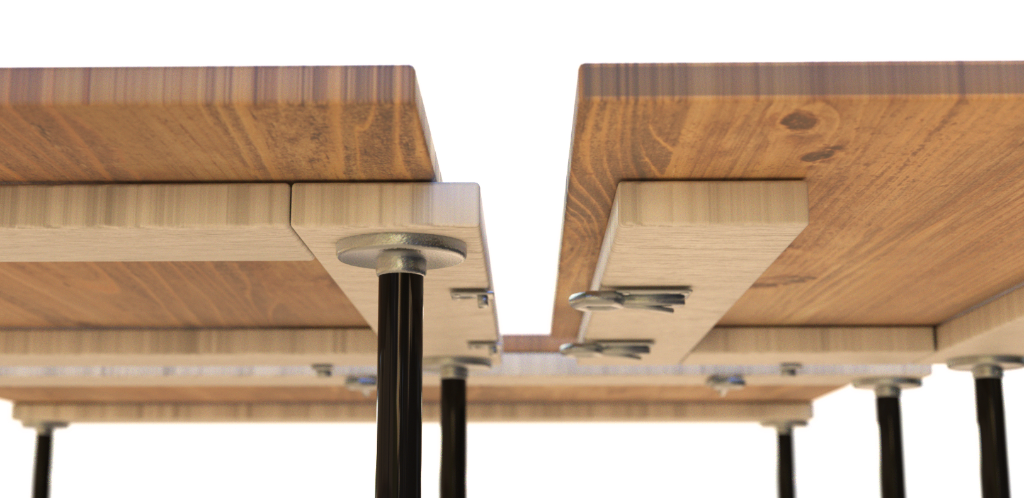
Extension Support
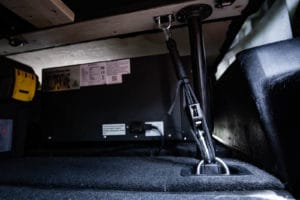
Here you see how the twin extension piece shares support with the single configuration legs, and the clips keep it all in place. Also here in the close-up, you can also see that the legs are simply screw in piping, a simpler method, and does not require tools to add and remove them during assembly.
Construction time!
So now that the design was in place, it all started with a trip to Home Depot – a hardware chain here in Canada. I managed to source the timber and screws, and Amazon did the rest with clips, legs, mounts, rubber feet, strap down pulleys and carpet, etc.
Before we go over any of the actual build, I want to at this point give a big shout out to Mike Hill. I couldn’t have done the next steps without his help. I’m immensely grateful for him providing his space, tools, and time to help put this all together. Without that, I’m not sure how I would have built this.
I didn’t capture too many shots over the course of the build, since focus was on getting it done. However overall the project really broke down into the 3 main stages. Woodwork, fittings, and carpeting.
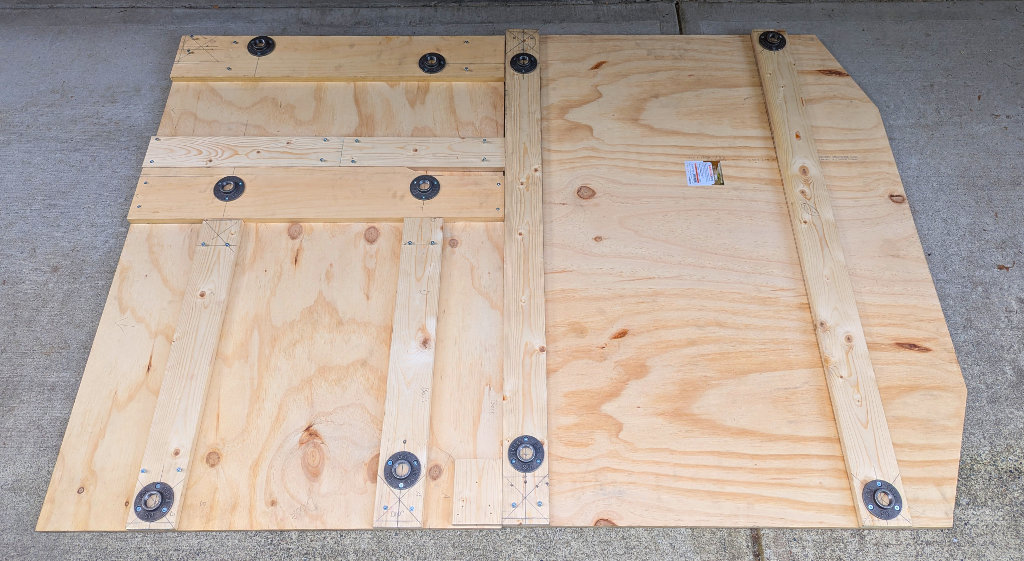
Wood assembly and leg placement
We initially spend a a couple of evenings cutting all the wood, screwing it together and through trial and error we worked out the best placement for each of the legs. Due to the nature of the car interior, this meant every leg needed to be checked that it was touching down on an appropriate part of the car.
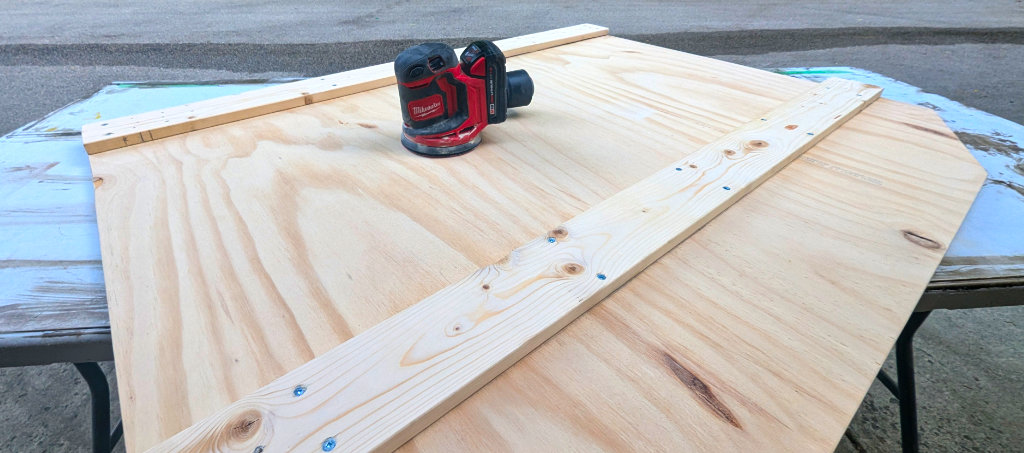
Sanding
Once all that was in place, all the pieces where sanded down to give a better finish and remove all sharp corners
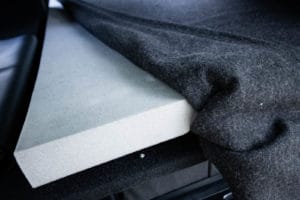
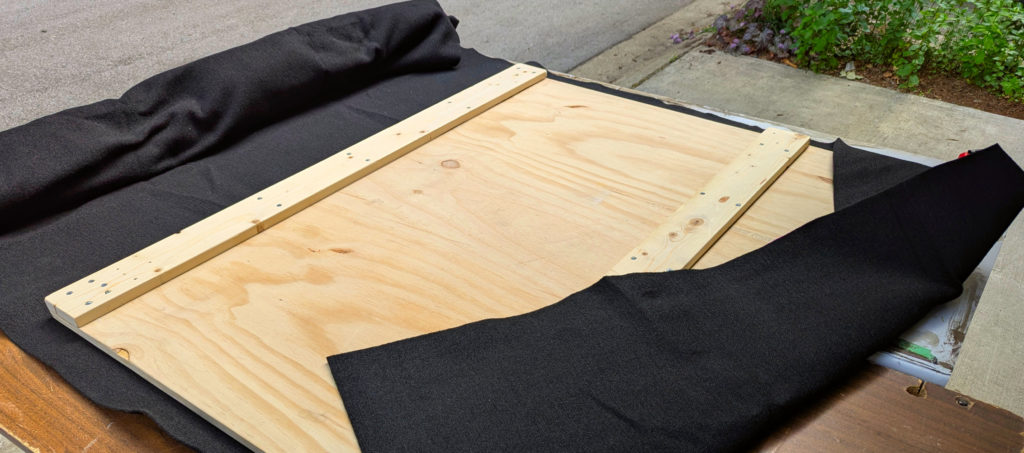
Carpet
Then came the carpeting process. We unassembled the pieces, sprayed the carpet and surfaces with a special glue and folded the material around the pieces.
Using a staple gun we were able to secure the fabric, and screw the wood pieces back together over the folds. Once we had coverage, I just simply needed to cut back the carpet to have a nice short edge, and finished by doubling down on staples.
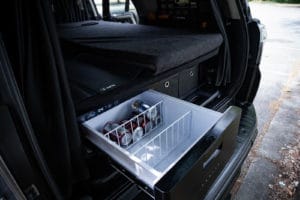
Legs
Next was the legs. The goal was to have enough clearance to support the drawer fridge unit I already purchased.
With the back of the car not really appearing level throughout, we were concerned it would be complex to do each leg length. It was actually easier that we thought. There was only 2 sizes thankfully. The 2 rear legs where a bit longer, with the rest then being the same size. Out came the hacksaw, and we cut down all the legs. Tough work since the legs are solid steel piping.
Rubber feet were then used to hide the cuts and with the top of the piping already threaded, we just needed to screw them in.
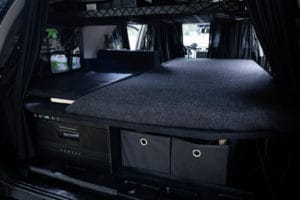
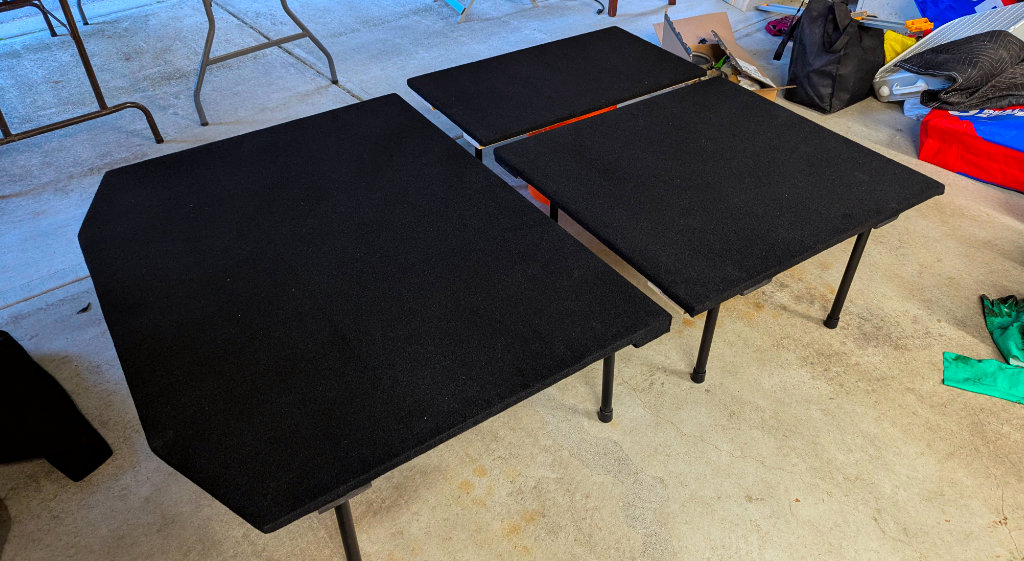
Result
And there we have it. Three modular pieces that slot into the car. Simple right? Well, although the build went smoothly and didn’t hit any issues, do set aside around 10hrs or so if you looking to do the same!
Final Results Gallery
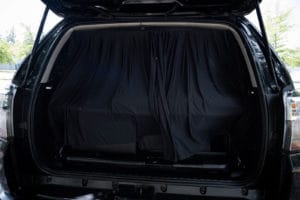
Below you can check out the final result in the car, and how it all integrates together. My next post I’ll share how my first test night went – an adventure out to a lake in Manning Regional Park.